![[IMAGE]](http://www.darrylsgarage.com/911/1974-911.jpg)
Darryl's 1974 Porsche 911 Restoration Project Journal
NEWS FLASH! THE '74 911 IS GETTING A NEW ENGINE!
![[IMAGE]](http://www.darrylsgarage.com/911/32ss-outside.jpg)
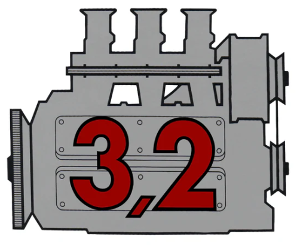
A new engine is being built for this car, click here: Short Stroke 3.2 Project Blog or the 3.2 graphic below to read about the details.
![[IMAGE]](http://www.darrylsgarage.com/911/911at10.JPG)
Last Updated on January 17, 2025
![[IMAGE]](http://www.darrylsgarage.com/911/911cthru.jpg)
PROJECT JOURNAL ENTRIES (IN CHRONOLOGICAL ORDER)
Click Here to Jump to THE LATEST WORK
Entry: 11/4/04 - Oh BOY a new TOY! I just became the most recent owner of this '74 911 for $9,500 today! I can't wait to begin applying TLC detailing to what I think is a diamond in the rough. I've become buddies with the owner of a nearby European car repair shop and regularly stop in to chat with him while walking my dog. This 911 caught my eye as it sat in the corner of the shop waiting for some hard to find parts to fix the drivers side window riser mechanism. My buddy raved about how clean it was and mentioned the owner was considering selling it since he didn't use it enough to justify putting any more money into it. After looking at it for a couple weeks, fondly remembering my first 911 I sold in 1997 (an '82 SC Targa) and the mid-life crisis that inspired its purchase, I finally gave my buddy my business card to pass on to the owner. A call from the owner came about a month later and we kind of reluctantly "circled" each other for a week before I took it for a test drive and fell in love with it. A pre-purchase inspection at my old Porsche shop turned-up some relatively minor issues (those that I can fix myself) we arrived at the price and struck a deal which included having my buddy install a new starter in it. Here's a picture of the car the day I picked it up from my buddy's shop (that's my maroon and silver 1989 F-250 4x4 I purchased last summer with only 91K miles on it in the background):
![[IMAGE]](http://www.darrylsgarage.com/911/eurotech.jpg)
The only flaw in the car that causes me any concern is this damage under the passenger door handle. It appears that the paint has been damaged so even if the Dent Wizard can remove the bend in the metal the flaw in the paint will remain. There are also some very deep chips in the paint from door dings that go all the way to the primer. I don't think there is any way to fill these chips so that they won't be visible since the metallic paint doesn't brush-on and look the same when sprayed-on when buffed-out. This area will probably require a trip to the bodyshop and a professional repair job.
![[IMAGE]](http://www.darrylsgarage.com/911/damage.jpg)
This car has all the receipts from a no-expense-spared restoration in the early '90's, including a costly upgrade of the original (and problematic) 150 HP, 2.7 liter mangnesium-block engine to a 180HP, proven "bullet-proof" 3.0 liter '80 911SC aluminum-block engine by John Walker's shop here in Seattle. The latest owner made the mistake of parking this beautiful machine safely in his garage and letting it sit so cosmetically it's beautiful but the pre-purchase inspection found the signs of sitting idle in a damp climate; a hole rusted in the muffler, a brake caliper binding, a leaking front strut and sundry little problems. The engine gave an excellent compression test and it runs, shifts and drives very nicely. The interior is a bit tired and I've started a wish-list of upgrades in the near future to give it more of a "sporty" rally car look. I'm planning to contrast the black leather interior with a brushed aluminum and vivid red highlight theme.
Entry: 11/11/04 - I've already invested a significant amount of labor in the intensive task of stripping the anodized finish off the Fuchs wheels, polishing the underlying aluminum and repainting the spokes. So after 16 hours of labor, two (the right side) are done and remounted on repainted calipers and disc brake rotor hubs... makes a pretty stunning improvement, eh?
![[IMAGE]](http://www.darrylsgarage.com/911/BNA1000.gif)
![[IMAGE]](http://www.darrylsgarage.com/911/fuchsb4.jpg)
![[IMAGE]](http://www.darrylsgarage.com/911/fuchs.jpg)
A day at the Dent Wizard in Bellevue took care of several pretty significant dents on the passenger side door, left rear fender and front hood. I am amazed at how effective their technique is, the idea they can push these dents out without having to remove the window and interior panels is amazing. As you can see, it looks like it never happened:
![[IMAGE]](http://www.darrylsgarage.com/911/dentwiz.jpg)
Here's a before and after of the front trunk. The car does have great tunes, a Kenwood in-dash stereo and 10-CD changer mounted in the front trunk. Note the tired and rotting away charcoal gray perlon carpet and bumper "smile" and fuse box held together with duct tape! After restoring the rusted front lip of the trunk, adding a master cylinder reservoir cover and cleaning-up the fuse panel, the new carpeting looks pretty stunning! I still have to reinstall the CD changer and new bumper "smile" after I repaint the bumper.
![[IMAGE]](http://www.darrylsgarage.com/911/911trnk.jpg)
![[IMAGE]](http://www.darrylsgarage.com/911/911trnk2.jpg)
I've registered the car as a "collector vehicle" for a one-time licensing cost of $35 and will be adding it to my collector car insurance for about $100 per year. The only stipulation is that the car cannot be driven more than 2500 miles per year and not used for commuting to work... WORK??? No problem, I'm retired!
Entry: 11/12/04 - European style Hella H4 headlights with black trim have been added (see picture at top). I'm not quite sure about black headlight rims but the option always exists to paint the rings silver to match the car like the 85-89 Carrera, for the moment, I'm thinking of more of a vintage race car look and definitely don't want chrome ones. I did discover a bit of rust in the headlight buckets that will need to be addressed to keep it from spreading. The old open "sugar scoop" headlight style allowed water to come in through the front of the headlight and pool, not a good thing in Seattle's damp climate.
![[IMAGE]](http://www.pelicanparts.com/catalog/images/new_images2/H4_Upgrade_Blk.JPG)
Here's the before and after shot of the engine compartment once I cleaned and detailed it, note the gold "Doctor John Walker" badge and the new data plates. Once the surfaces were degreased, I gave them a thin coat of semi-gloss acrylic clearcoat to give them some luster again. The cooling fan and shroud were steel brushed and sanded to remove all the corrosion and remaining gold anodized finish and produce a nice shine, then clear coated to protect them from corrosion. The silver paint around the right side of the compartment flaked-off when I used high pressure hot water to degrease the engine, so I had to mask-off and repaint that side of the engine compartment with my Toyota Millennium Silver spray paint.
![[IMAGE]](http://www.darrylsgarage.com/911/911eng.jpg)
![[IMAGE]](http://www.darrylsgarage.com/911/911eng2.jpg)
Entry: 11/15/04 - I have some touch-up painting to do in the engine compartment, on minor rust repairs and on some door dings. A perfect solution would be finding an off-the-shelf spray paint instead of having to color match and mix at an autobody jobber and painting it with my gun. Well, here's an excellent stroke of luck! I took the old headlight ring over to GI Joe's Autoparts store to see if I could find a color match in their extensive selection of Dupli-Color touch-up spray paints. I bought a couple that looked pretty close when comparing the painted lids to the headlight rim in the store. A further test when I got home, of spraying a piece of tin arrived at a near perfect match, Toyota Millennium Silver, factory paint code 1CU! Here's a picture of the test swatch laying on the hood of the 911:
![[IMAGE]](http://www.darrylsgarage.com/911/silver.jpg)
Entry: 11/20/04 - Today I finished polishing mag wheel number 3 but took repainting the brake rotor hub, caliper and suspension a step further. I cleaned, prepped and painted the entire left-rear wheel well using the silver paint I found the other day. So while I only have one more mag wheel to polish, I've got three wheel wells left to restore! I've got to say that I'm pleased with how it looks:
![[IMAGE]](http://www.darrylsgarage.com/911/911wwell.jpg)
I also stopped by the shop of Doctor John Walker in Seattle to see what he remembered about this car when he put it together over 10-years-ago. He didn't remember much beyond the owner who did the restoration but when I mentioned that state of the dashboard, he mentioned he had a used one in very good condition that would fit it. Well, it didn't take long to realize that this is exactly the dash I want for the car to replace that nasty looking one that is in it. Now the new dash is in the basement, soaking-up McGuires vinyl conditioner like it's a spa treatment! I am getting very excited with how all this stuff is coming together:
![[IMAGE]](http://www.darrylsgarage.com/911/911dash.jpg)
Entry: 11/16/04 - The new spray paint discovery was put to use today on the right side of the engine compartment which had lost most of its paint during the hot water degreasing washdown. As you can see, the silver paint matches the paint on the edges of the engine compartment opening very well. Given the ease and low cost with with which I can paint using this spray paint, I will be cleaning and repainting the insides of the fenders (wheelwells) for a factory fresh appearance as well.
![[IMAGE]](http://www.darrylsgarage.com/911/911eng4.jpg)
![[IMAGE]](http://www.darrylsgarage.com/911/911eng3.jpg)
Entry: 11/24/04 - Over the last couple days I've been busy; I finished polishing the last of the mag wheels and turned my attention to the interior. I've installed the new steering wheel, shift knob and RS style door panel on the driver's door. Time for the before and after pictures!
Here's the before shot of the interior, note the dashpad has been recovered with vinyl and the tired original steering wheel. My legs are so long the larger diameter steering wheel makes it difficult to shift into 1st gear without my thigh getting in the way. The smaller, 350 mm diameter Momo Prototipo steering wheel in the after picture, with an additional 15mm spacer ring gives me all the room I need for the gearshift and my thigh. I really like the looks of the plain billet aluminum gear shift knob with the 915 transmission shift pattern, it gives the car a nice clean factory racer look. How about those red polka-dot coco mats! Soon a new windshield will be installed and while the windshield is out, I'll pop-in that clean used dashpad!
![[IMAGE]](http://www.darrylsgarage.com/911/911int.jpg)
![[IMAGE]](http://www.darrylsgarage.com/911/911int2.jpg)
As you can see in the following pictures, the front seats were recovered in black leather in the last restoration and aside from some minor wear on the drivers outboard side, still look very good. The back seats are still the original dark navy blue. I will be finding a used set of black ones to replace these and the side panels (Update: These items were found on eBay on January 10, everything for $100 and will be switched-out soon).
![[IMAGE]](http://www.darrylsgarage.com/911/911int3.jpg)
![[IMAGE]](http://www.darrylsgarage.com/911/911intx.jpg)
The factory interior was actually a mix of black trim and a very dark navy blue as you can see on the door panel in the before picture. The headliner has been changed from the factory white to black, which looks perfect for the look I'm wanting. The arm rests and fiberboard door pockets are a bit tired and the upgrade to the Spartan, minimalist factory racer style RS door panels pictured below in the after picture really make the interior look crisp and new. I must relocate the stereo speakers from the door to an underdash set-up. While I had the door apart, I replaced the door check strap and added a reinforcing kit sold by Pelican Parts, to cure a loud clicking sound when the door was opened.
![[IMAGE]](http://www.darrylsgarage.com/911/911door.jpg)
![[IMAGE]](http://www.darrylsgarage.com/911/911door2.jpg)
Entry: 11/30/04 - Over the last couple days, I've removed the headlights and fixed the holes rusted through in the housing buckets. The first step was to grind off as much of the rust as possible with my Dremel tool and sealing the rust with SEM Rust Mort. The largest holes were about the size of a playing card and I was able to fiberglass it closed by spanning the gap with aluminum window screen cut to size and glued to the perimeter of the hole with J & B Magic Weld and then layering fiberglass over the screen. Now the headlight buckets are sealed tight with new drainage plugs and rim seals installed. Today the UPS guy brought my new factory toolkit I won on eBay a week ago. It has a couple missing items like the pliers, tow eye and screwdriver shafts but otherwise is pretty complete and in good condition. The little rust that was on the tools got the steel brush and clear coat treatment to clean it up and seal it. As you can see, the toolkit looks practically new displayed in the trunk. I need to find a 12-volt tire inflating pump for the space-saver tire. (NOTE: 1/2/05 - I've found everything I needed to complete the toolkit and have updated the picture below:)
![[IMAGE]](http://www.darrylsgarage.com/911/911tools.jpg)
Entry: 12/5/04 - A month ago, I won a good, servicable used 911 SC muffler on eBay for only $31. The seller jacked me around a bit because he didn't get the price he wanted for it and after some negative feedback "salvoed" back and forth, and getting eBay involved, the silly thing finally arrived yesterday. My old muffler had a hole and I suspect it was the cause of some carbon monoxide entering my heating system. Also a few weeks ago, I won a catalytic converter "bypass" tube for $84 on eBay to replace the possibly plugged one on my car. So after cleaning them up and giving them a coat of Eastwood's high temperature satin silver exhaust paint, I've got a servicable exhaust system for my Porsche for slightly over $100! New gaskets, oxygen sensor plug and bolts add another $25 to the cost but hey, it's way cheaper than having to buy new ones for about $500! I spent most of today under the car, giving it a thorough de-greasing while the muffler was off. I attempted to adjust the parking brakes and discovered a mechanical problem in the left side so add another project when I rebuild the rear calipers! The car is going into Doctor John Walker's shop to be "dialed-in" on Wednesday so I need to get the new exhaust installed tomorrow and run the car to get any remaining moisture out of everything. My degreasing technique uses lots of high pressure scaulding hot water directly out of my hot water heater so I'm sure there's some moisture in there now!
![[IMAGE]](http://www.darrylsgarage.com/911/911exhst.jpg)
![[IMAGE]](http://www.darrylsgarage.com/911/911eng5.jpg)
Entry: 12/12/04 - Oh man, this baby runs like a scalded cat now! I had the car into John Walker's Workshop last Wednesday and Thursday for a "first pass" on ironing-out the problems with the rough running in the cruise RPM range. I also had John drive the car and give me feedback on how it drove, braked, shifted and how the clutch felt. Well, after adjusting the valves, replacing the fuel filter, setting the timing and fuel injection mixture, plus a new clutch cable and shifter bushing set, the car performs 1000% better!!! The new (eBay used) muffler cured the heater's carbon monoxide problem, so today I took "the Mrs." out for her first ride in the car on a nice 60-mile cruise around the country roads to look at all the flooding that's been going on. The car is now an absolute pleasure to drive. John said the timing chain noise wasn't bad enough to worry about it, rather just to keep an "ear" on it. Next step is dropping the car off at my local body shop on 12/20 for some paint work on the passenger door and quarter panel to fix the paint damage that remained after the Dent Wizard removed the dents. After Christmas, I'll take the car back into John Walker's Workshop for some further refinements to fix a slight surging which John believes is a fault in the fuel injection system's warm-up regulator. John Walker is a joy to work with, easy-going and seems to enjoy my quest to understand the details. I love to show him that I know my way around a Porsche and appreciate him pointing out things that need attention I can work on myself instead of him doing it. I've ordered the rear brake caliper rebuild kits and will be tackling that job once the car is out of the body shop. Oh, and "the Mrs." gave the car her approval, she loves to go for drives on the backroads as long as I don't speed... she's not buying the, "But Honey, the speedometer is off by about 10%" line. I've gotta get out my fishing GPS and figure out exactly how accurate the speedometer is!
![[IMAGE]](http://www.darrylsgarage.com/911/911JWW.jpg)
Entry: 12/19/04 - There are some pretty good rock chips, dents and door dings that need attention so tomorrow the car goes into the body shop to do some minor body and paint work on the passenger side rear quarter panel / door area and front bumper and valance. To save a little labor cost, I've removed and disassembled the bumper, front valance, right rocker panel cover and the door's interior panel to remove the outside door handle. I scrubbed these pieces up with Simple Green and a scrub brush and then removed any road tar with mineral spirits. Finally I pounded out the dents and straightened the rocker panel cover and valance before covering the passenger seat with a moving blanket and setting these parts inside the car for transport to the bodyshop. I bolted the bumper back on the brackets with only two nuts so the bodyman has little to do before prepping the pieces for fresh paint. I've had this shop do work for me before so I'm pretty confident they'll do a good job. The owner of the shop quoted me a price of $600 to $800 for all the work and he would only charge me for time and materials. I steer clear of body shops that use estimating software for work I'm paying for out-of-pocket. It's clear that some shops are into gouging insurance companies and don't want to deal with special interest cars. Luckily this shop seems to enjoy getting to work on cars like mine. I am anxious to see how closely they can match the silver paint and how well they blend it with the existing panels. A hood bra is on my Christmas wish-list, I hope Mrs. Claus was listening when pointed out the page with the circle on it in the catalog! I probably won't see the car again until after Christmas, but then the new front bumper "smile" goes on when I reassemble the car! I'll also be installing the RS style door panel on the passenger side, since I delayed doing so until the bodywork disassembly was complete so I would only have to install it once.
![[IMAGE]](http://www.darrylsgarage.com/911/911paint.jpg)
Entry: 1/1/05 - Happy New Year! You've got to love a bodyshop with a glass wall so you can check on your car's progress on a holiday! I shot this picture this morning through the picture window on the store-front of the bodyshop. Progress is slow, which is OK since being a filler job was part of the deal with my price negotiation on this paint job. The bumper, front valance and rocker panel are off at a media blaster to be stripped to bare metal because of the thickness of the paint already applied. This explains the severe, deep chipping that occurred. The Dent Wizard guys have returned to the car to remove a couple dents that were missed on the previous session, which is good because we're avoiding the use of filler putty which eventually shrinks and the repair becomes visable over time. I'm happy to report that Mrs. Claus came through with an official Porsche hood bra with the embossed Stuttgart crest on the hood boot! Rock chips will be prevented on the freshly refinished bumper and front valance from now on. I've got to remind the bodyshop manager that I need at least a pint of the paint mixed to match the car so I can do my own spot touch-ups with my air brush where the rattle can solution isn't good enough.
![[IMAGE]](http://www.darrylsgarage.com/911/911prep.jpg)
Entry: 1/18/05 - After just a few days shy of 4 weeks in the body shop, my car was "liberated" yesterday. I am almost giddy with the results of the repair work, all the waves, scratches and paint chips are gone and the paint is a perfect match. It's funny how I now find other areas of the car that could use some attention now that the old bad spots are now perfect! The bodyshop fixed all the problems with the passenger door / rear quarter panel and media blasted and painted the front bumper and valance. Check out the before and after, deep chips and marred paint below the door handle that remained after the dents were removed on the "before" shot. The after shot showing a perfectly straight reflection of the seam in the concrete garage floor and no chips. Now I've got to reassemble the front bumper using my new "smile" and reattach the rocker panel.
![[IMAGE]](http://www.darrylsgarage.com/911/911body1.jpg)
![[IMAGE]](http://www.darrylsgarage.com/911/911body2.jpg)
Since this car has a bigger engine than was original, how about a new engine lid grill badge styled after the original 1974 "2.7" liter badge but showing the "3.0" to reflect it's true "MORE POWER" status of having a later 1980 911SC's engine. I acquired this badge from Pelican Parts but it came rough machined billet aluminum with the machining marks still in it as is the current style (I guess looking like a CNC machine made it is the idea). I wanted it to look more finished and like the original equipment badge so I took a jeweler's file to the machining marks, bead blasted it to remove the file marks and then put it on the buffing wheel to polish the letters with jeweler's rouge and repainted the black background. I think it looks stunning bolted into position over the original "2.7" badge's mounting holes in the grill!
![[IMAGE]](http://www.darrylsgarage.com/911/2point7.png)
![[IMAGE]](http://www.darrylsgarage.com/911/3point0.jpg)
Entry: 1/21/05 - The freshly painted parts are all back together and I took the car out for a nice drive today. Putting the front bumper back together with the new rubber "smile" was actually quite a difficult task. At some point in the car's life it had been towed and everything was just a bit bent out of shape. This became even more of a problem when the front valance was straightened because nothing lined-up and needed to be carefully levered into place using pry bars and floor jacks. I'm quite pleased with the final result as you can see in the following pictures, it's back to factory gaps all the way around the bumper and the bumper "accordians." I found a complete set of very clean used front turn signal and side marker light lenses on eBay, which just happened to arrive at the exact time I needed them, like a "just-in-time" inventory item!
![[IMAGE]](http://www.darrylsgarage.com/911/911bump.jpg)
The repainted rocker panel went together without any problems, one thing I did was replace all the old hardware with new stainless steel so it can't rust again. The RS America style passenger side door panel has been installed and better door top trim pieces (also found on eBay) were installed on both sides.
![[IMAGE]](http://www.darrylsgarage.com/911/911rock.jpg)
There are remants the an air conditioner system (the freon accumulator) still visible in the wheelwell which will need to be removed since everything under the dashboard and in the engine compartment has been removed. I would not want air conditioning on this car anyway. Next project is replacing the windshield and while it is out, replacing the tacky recovered dash pad with the good original one I purchased from John Walker back in November.
Entry: 1/31/05 - The windshield came out today without any problems. The seal was pretty heavily "caulked" in with black body caulk so I cleaned the window frame out with a bondo spreader and a rag soaked with mineral spirits and found no rust lurking there. You can really see how shabby the recovered dash looks with the windshield pulled out. The windshield seal was still very soft and pliable but the ribbed sealing channels were clogged with the sealing caulk so I ordered a new German OEM one from Pelican Parts this evening. I'll carefully cut the aluminum trim out of the old seal since it has been powdercoated in black so nicely by the guy who restored it about 10 years ago. I would prefer to preserve the powdercoated aluminum instead of going with the newer black plastic version. You can also see the eBay purchased, black vinyl rear seats and side panels laying on the table in the background, a future project to replace the navy blue ones. Tomorrow I start removing all the defroster/vent air box components fron the front trunk side of the dashboard to get at the dash pad fasteners. It should not be a very difficult job since I've done it before on my 914 and know what to expect.
![[IMAGE]](http://www.darrylsgarage.com/911/olddash.jpg)
Entry: 2/1/05 - The old dash pad came out today without putting up much of a fight! I didn't have to remove the entire defroster/vent air box from under the dash, just the floor vent outlet and hoses on the passenger side. I was able to get to all the retaining nuts on the driver's side through the gauge holes, removing all but the tachometer and letting them hang by their wires while I turned the ratchet. A quick wipe-down with mineral spirits and repainting the flat black areas in and around the defroster vents and touching-up the black vinyl in the corners of the windshield pillars and it's ready to install the new dash pad tomorrow after the fresh paint cures overnight. While I've got the dash apart, I'm installing the new (used) glovebox door, driver's side knee pad and the under-dash Moch-1 speaker bezel. I'm also going to remove all the air-conditioner components from the "smugglers box" in the trunk. The UPS Tracking web page shows that my new German OEM rubber windshield seal will be here on Friday so I'll contact the glass shop tomorrow and schedule an install date for a brand-new windshield for early next week!
![[IMAGE]](http://www.darrylsgarage.com/911/dashout.jpg)
Entry: 2/2/05 - I stopped by the glass shop on my morning coffee run and set-up a new windshield install appointment for next Wednesday the 9th. The new (used, original) dash pad went in without too much fighting it. I did have to drill a new hole for the stud that goes right next to the clock and enlarge the hole next to the gas gauge a couple mm to get the stud to line up, but it wasn't much of an issue. So now the dash pad is bolted back in and all the gauges are back in place and it looks fantastic! There is a bit of a warp in the center, next to the left defrost vent so I had to put together a bracing jig to hold it in the correct position while I used my heat gun to bend it. I studied the old dash pad to see where the sheetmetal "skeleton" was and saw where the flex points are for heating. A couple big vicegrips are clamped to the windshield pinch weld seam so I can run a steel rod in between them to apply pressure to a couple custom-sized strips of plywood. Spare household door frame installation shims (wedges) did the perfect job of being able to apply more pressure as the dash pad "gave" with the heat applied. A similar warpage in the dash pad on the end of the right side came right out with the heat gun, so I'm optimistic that this jig will fix the center warp too. I make sure to keep from applying too much heat and damaging the vinyl by running my bare hands across the surface as I heat it. If it's too hot to touch, I stop heating it any further. If this first approach doesn't work, I'll put something under the bend point on the pad to serve as a fulcrum and try it again. With the windshield install a week away, I have all that time to keep working this warp, sheer willpower (and a Black & Decker heat gun) will prevail!
![[IMAGE]](http://www.darrylsgarage.com/911/dashfix.jpg)
Entry: 2/3/05 - IT WORKED! My elaborate jig for pressing down the front center edge of the dash pad and holding it down while I heated it with my Black & Decker heat gun did the trick. Heating the pad so hot I couldn't keep my hand on it, increasing downward pressure on it using the jig, then letting it cool overnight in the mid-50 degree temperatures seemed to make the new "bend" permanent. The front edge on the left inner defrost vent was warped about a �" higher then the right side. Now there is no more than 1 mm difference from the right side! I replaced the glovebox door and left side knee pad on the dash today and purchased the speakers that will be going in the "Moch-1" underdash speaker (and wire cover-up) bezel. I'll take a picture of the dash face and under dash area once the "Moch-1" is mounted. Now all the grain patterns in the vinyl match on the dash pad, dash face, glovebox, knee pads, ashtray and door top trim. There was quite a mix of grain patterns from the mish-mash of parts used from models across the 25-year production variations of the donor cars. Now everything is matching again, even if the dash pad is from a '69 with the simple "holes-only" speaker opening. I'm currently bidding on a 1988 model's black leather rear deck on eBay which accomodates speakers, with the intent of adding 4"x6" speakers back there and taking advantage of the 4-channel, 35-watt per channel power of the Kenwood stereo. I'm also planning to relocate the 10-disk CD player in the front trunk's "smuggler's box" once I remove all the airconditioning hardware from it and seal it up. The new windshield weatherstrip arrived from Pelican Parts today so everything is tracking for the new windshield install on Wednesday!
![[IMAGE]](http://www.darrylsgarage.com/911/dashdone.jpg)
Entry: 2/4/05 - Today's project was filling the hole left when removing the air conditioner unit from the "smuggler's box" in the front trunk and installing the used "Moch-1" under-dash speaker bezel I bought off eBay. There was a 11" x 9" rectangular hole at the foot of the passenger side firewall that needed to be filled in and sealed from water and dust. I cut a piece of 18-gauge sheetmetal to fit the opening on the "smuggler's box" side and glued it into place using black butyl windshield seal, the stickiest stuff known to man! I filled the opening from the passenger compartment side with �"styrofoam to insulate it from road noise and glued tar paper over the top so it looks almost as though the hole never existed when the carpet is removed. The new speakers went into the "Moch-1" unit very easily, using the original screw holes and the whole thing snapped right into place, only requiring one screw behind the left side speaker to keep it in position. So here's the completed dashboard, all the old parts replaced with used from eBay or the junkyard; new dash pad, new left knee pad, new glovebox door and "Moch-1" speaker bezel. How about those nice "911S" floor mats and instrument trim rings to finish the red and brushed aluminum trim redo!
![[IMAGE]](http://www.darrylsgarage.com/911/moch-1.jpg)
Entry: 2/7/05 - Today's project was to fabricate a rack to hold the 10-disc CD player in the wasted space called the "smuggler's box" in the front trunk. The idea is to suspend the deck in the opening of the "smuggler's box" lid depression. The "bezel" (the part shaped like the lid of the "smuggler's box") is made of 14-gauge steel, the box is 22-gauge. 14-gauge should be stout enough to bear the weight of the deck without flexing when the road gets rough. The box in the rack will be water-tight and the seal around the "smuggler's box" lid will seal it from dust. I'll add some adheasive foam weatherstrip to the bottom edge of the "bezel" of the rack to seal dust and moisture out of the trunk. All that is required to remove the rack to get at the steering linkage is lift the whole rack out and unplug the CD deck. The latch of the lid will hold the rack in place when it's closed. A thick coat of semi-gloss black paint is drying as I type this... tomorrow I'll install the deck and mount the rack in the trunk.
![[IMAGE]](http://www.darrylsgarage.com/911/10cdrack.jpg)
![[IMAGE]](http://www.darrylsgarage.com/911/cdrack2.jpg)
Entry: 2/8/05 - I ended-up using black "wrinkle" paint on the "bezel" of the "smuggler's box" CD rack. This is the same finish found on electronics cases and it won't show scratches and fingerprints like plain paint would. Just a couple days ago a derelict and quite heavy air conditioning unit was occupying the "smuggler's box" but today it's being put to better use, hiding the CD-deck from view and opening the trunk up to haul luggage. The CD-rack fits the opening like a glove and is very secure. So, tomorrow the glass guy is installing the new windshield, now everything is ready and waiting! I can't wait to take the car out for a drive again with the sunny and clear weather we've been having!
![[IMAGE]](http://www.darrylsgarage.com/911/ac-unit.jpg)
![[IMAGE]](http://www.darrylsgarage.com/911/rackdone.jpg)
Entry: 2/9/05 - YEAH BABY!!! New windshield installed today and got to go out for a drive! The photograph doesn't do it justice but it is so great to drive a car with new glass, no rock chips or sand pits! The new OEM rubber seal worked fantastic, the old alumium trim popped right in and the new dash pad has a nice uniform edge against the rubber seal along its front edge. I couldn't have hoped for a more ideal outcome on this little project. It's always a bit of a coin toss whether the project is going to have more problems "after" than "before." In this case, the outcome was 100% positive. It was great to listen to my CD's on my little cruise this evening too. All-in-all a very satisfying milestone has just been passed in this project! A whole bunch of items have been 'X'-ed off the project task list, new (better used) PORSCHE reflector added to the rear of the car, new rear-view mirror on the windshield, all the CD deck relocation stuff, heater control light, recoloring the sunvisors, and so on. Next big project is speakers in the rear window shelf and getting the navy blue out of the back of the car (rear seats and side panels)
![[IMAGE]](http://www.darrylsgarage.com/911/newglass.jpg)
Entry: 2/15/05 - I made the decision that the rear compartment of the car needs to be black AND the same grain pattern as the front doors and seats. I've re-thought the rear deck speakers and decided to fabricate my own raised rear shelf to house the speakers and try and keep as much of the 1974 styling of the rear panel and shelf as is possible. I've taken apart the first black vinyl-covered side panel I bought off eBay and removed the water damaged (warped) fiberboard top panel. I made a pattern of the fiberboard panel with white paper (see picture) and then transferred the shape to a clear polystyrene plastic panel I cut out of a cheap Christmas decoration storage box I bought at the office supply store. It is the same thickness but much sturdier than the fiberboard. I found black vinyl at my local upholstery shop, that matches the leather RS-style door panels for $25 / yard (it comes in a 51" width) that I'll be recovering these pieces with. I've started gluing it to the panels and will see if I can use my trusty Black & Decker heat gun to form it smoothly over the compound curves of the lower plastic wheel house cover. I made a gluing form out of chip board to hold the 'S' shaped edge of the vinyl when I glue the top edge to the wheel house cover. I thnk this is one of these procedures that will take several phases, letting the glue dry very well before moving on to the next phase... we'll see. HEY! I GOT THE CALL TODAY, MY 4-POST SERVICE LIFT IS GOING TO BE HERE SOMETIME LATER THIS WEEK!!! WOO-HOO! Once I get the lift installed, I start doing all those under-car projects on the checklist above. I really can't wait to get those wheelwells cleaned-up and repainted, they make a very dramatic change from the curb-side view.
![[IMAGE]](http://www.darrylsgarage.com/911/rearside.jpg)
Entry: 2/17/05 - I've nearly completed the first rear side panel reupholster job today and sitting side-by-side with the original, I think it looks pretty good. There's still some "fitting" to do with the vinyl, that is using the heat gun to stretch the vinyl and smooth a few of the remaining "pulls" so the padding lays smoothly. For the first attempt, I'm very happy with the result and think it will look very good once it's installed in the car since most of the edges are actually covered with mounting frames. I find it amazing how many flaws there are in the original ones in the car that don't really jump out, so I try not to be too critical of my do-it-myself job until I see it in the car. The color, grain and "flatness" of the vinyl matches the leather on the front door panels perfectly! Delivery schedule update on the new 4-post lift, Tuesday the 22nd!
![[IMAGE]](http://www.darrylsgarage.com/911/recover1.jpg)
Entry: 3/4/05 - Ok, the 4-post lift is in and it's time to come up with a fixture to allow me to remove all 4 wheels at once to do brake bleeding and such. I did purchase a jack tray with the lift and this fixture allows me to jack up one side of the car at once but I don't think it's stable enough to try and lift both wheels on an axle at the same time. My solution is using a big 4" x 6" timbers C-clamped between the rails at the front and rear of the car and lowering the car onto blocks on top of the timbers at safe resting spots on the unibody frame and front suspension mounting points after removing the wheels. I started at the back, jacking at the bottom of the "banana arms" under the shock mounts and then the front jacking at the torsion bar adjusting point. It actually went very quickly and is rock solid once all the wheels are off and the blocks are in place and I can position the lift so the rails are the perfect "workbench" for my height. Now I need to fix my left rear parking brake problem (it won't adjust and hold), remove the remaining, derelict air-conditioner parts under the right front fender and fill the holes and redo the undercoat there, replace the brake fluid and bleed the brakes and generally clean and detail the wheelwells using the rattle-can touch-up paint I used on the rear left wheelwell. this should keep me busy for a few days. The left rear caliper doesn't seem to be binding anymore, perhaps it has something to do with the parking brake, so perhaps I can forgo rebuilding the calipers for now... if it ain't broke, don't fix it! Doctor John Walker suggested that he starts with new cables when parking brakes are not adjusting symetrically but I think there's something more going on and disassembling the rear brakes is the only way to figure out what. A parts order to Pelican Parts will follow the tear-down and that will take about a week to arrive.
![[IMAGE]](http://www.darrylsgarage.com/911/4post911.jpg)
Entry: 3/5/05 - My parking brake problem seems to be much ado about nothing. It looks to me like the work done by the prior mechanic was not done correctly. The cable was installed outside the retaining hole and the cable was able to move sideways and it popped the expanding arm off its retaining pin. No big deal, no new cables or parts required to fix this problem. As you can see, I've been busy with the brake cleaning solvent and the "banana arms" are all cleaned up, unfortunately at the expense of the orange paint on the Koni shocks. I will have to find matching paint and then apply the nice new KONI decals I ordered from their website!. The brake calipers will need to be rebuilt after close inspection. There was definitely some heat build-up on the left side and it would not compress to remove it from the rotor. I had to cut the metal brake line off to remove the caliper because it was siezed on. Luckily some patience with the penetrating fluid and some heating with a torch was able to get the threaded fitting out of the caliper but I will have to replace the brake line on the left side. All-in-all everything looks pretty good, nice thick pads and lots of lining on the parking brake shoes. The rotors are a little bigger than 19mm thick and the spec is 18 to 20mm, plus no big grooves worn into them... guess the drilled Zimmerman rotors will have to wait a bit!
![[IMAGE]](http://www.darrylsgarage.com/911/911pbrak.jpg)
Entry: 3/6/05 - BAD NEWS, both the rear calipers are junk. Today I tried to remove the pistons for a rebuild and they are rusted solid in both sides. I never thought to check whether they actually stopped the wheels from spinning and now I realize that the front brakes were doing all the work! YIKES! Now luckily the front calipers are "S" type aluminum ones with stainless-steel pistons so they should not be effected by moisture in the brake fluid like the cheap steel rear ones were... HOPEFULLY! Rebuilt rear calipers are not available so I just placed an order with Pelican Parts for a set of brand-new rear calipers at the tune of about $230 each! Luckily the pads and rotors are still very servicable so some costs can be saved. Another issue that is going to take some effort is the steel brake line. A little research on the web to find a replacement steel brake line for the one I had to destroy to remove the left caliper yesterday discovered that they are no longer available from Porsche. It looks like I'll be calling Denny Akers and John Walker and see where they get theirs from. I also disassembled the left parking brake and reassembled it correctly and it looks like it will solve that problem for $0 cash outlay, so dodge one bullet but get hit with a cannon ball! I actually kind of figured that the rear calipers were shot based on the lack of brake pad wear... luckily the frozen calipers didn't mess up the rotors.
![[IMAGE]](http://www.darrylsgarage.com/911/911junk.jpg)
Entry: 3/9/05 - While I'm waiting for my brake parts order to come from Pelican Parts, I've started to tackle another big project. I'm removing the A/C accumulator and the freon hoses that run from the engine compartment up to the "smuggler's box" in the front trunk. Pulling the lines out was not big deal but the resulting holes are UGLY! It looks like the guy who installed this at the dealership used an air chisel and tin snips to make all the holes, which was my fear when I saw the hole in the footwell of the passenger side for the evaporator unit I removed already. As you can see from the pictures, quite a pile of junk came out of the car but there are some gaping holes at each end of the rockerpanels to fill, as well into the side of the "Smuggler's box" and into the engine compartment above the oil tank. I will be using a similar technique to the way I fixed the rust holes in the headlight buckets, wire window screen and fiberglass. Luckily there is very little rust, just some surface rust in the rear end of the rockerpanel which will be easy to get at and seal. I bought a bottle of beige Wurth SKS Stone Guard to match the factory undercoating and the spray gun used to apply it so my repairs should be pretty much undetectable without a magnet!
![[IMAGE]](http://www.darrylsgarage.com/911/acjunk.jpg)
![[IMAGE]](http://www.darrylsgarage.com/911/acholes.jpg)
Entry: 3/11/05 - So far I've finished patching the two big holes in the passenger front fender using window screen and fiberglass, applying paintable undercoating and repainting the entire wheelwell with my rattlecan Toyota Millenium Silver touch-up paint. I've also sanded-off all the rust and repainted the KONI shocks on all 4 corners using hi-temperature Chevy red-orange paint which matched perfectly. New KONI decals I found on the KONI website for 4 for $2 put the finishing touch on the shock restoration. The big hole in the passenger rear wheelwell is filled and undercoated and the wheelwell will be painted silver tomorrow. The drivers side front wheelwell is also ready for silver paint tomorrow. The ETA on my new rear calipers Tuesday the 14th so I have to hurry to get everything ready for those to be installed, bleed the brakes and get this car back on the road! I'm just about done with the door threshold rubber strips on both sides after cleaning up all traces of rust. Things are looking pretty fresh and new and I haven't been down on the ground all week thanks to the new lift!
![[IMAGE]](http://www.darrylsgarage.com/911/fixhole1.jpg)
![[IMAGE]](http://www.darrylsgarage.com/911/fixhole2.jpg)
Entry: 3/12/05 - Today I've put the finishing touches on all the wheelwells and completed the A/C hole fixing project. As you can see in the following picture, the big gaping hole in the rear rocker panel (in the front of the passenger rear wheelwell) is painted and blends-in to the existing undercoating and seam sealer pretty well. A coat of my touch-up silver spary paint and it looks almost factory! I can't get too anal about an area you can't really see with the wheel mounted and the car sitting so low to the ground. The front wheelwell was where the most attention to detail was expended.
![[IMAGE]](http://www.darrylsgarage.com/911/fixhole3.jpg)
All the wheelwells are painted and detailed and I just had to show the results of hours of degreasing with Simple Green, various sized scrub brushes and scaulding hot water. Rather than repaint the original items, I prefer to clean them up using harsh solvents that remove the shine as well as the grime, then give them a coat of 500-degree clear engine paint like I did in my engine compartment, I think the horns and fuel filler hoses look pretty dang nice contrasting with the fresh silver paint, eh? Notice that the paint on the lip of the fender flare matches the paint on the inside of the wheelwell pretty close for a rattlecan.
![[IMAGE]](http://www.darrylsgarage.com/911/whwell1.jpg)
![[IMAGE]](http://www.darrylsgarage.com/911/whwell2.jpg)
![[IMAGE]](http://www.darrylsgarage.com/911/whwell3.jpg)
![[IMAGE]](http://www.darrylsgarage.com/911/whwell4.jpg)
Now all I have to do is reassemble the rear brake rotors and adjust the parking brakes before the new rear calipers arrive. Once they are installed, I'll need to bleed the brakes and put the wheels back on. Oh, I also finished replacing the rubber door threshold strips and the passenger side heater tube that was kindly taped back together by John Walker when the car was there last. I suspect my buddy at Eurotech who replaced the starter had a hand in schredding that hose in the process!
Entry: 3/18/05 - My brake work is all done and test driven; nice hard brake pedal with quicker stops and a parking brake that holds the car on my steep driveway. My new rear calipers went on without a hitch and with some help from John Walker, a custom sized brake line was fabricated and installed. My parking brakes wouldn't adjust correctly when I reassembled them and I found the root cause was mismatched length cables. John Walker ordered a new matching set of brake cables for me and they went in fairly easily. I also replaced the bushings in the shift coupler and noticed much less "slop" in the gear shift during my test drive. Today was the day for fluid changes, oil, filter, sump screen cleaning, Kendall GT 20W-50 engine oil and Swepco 201 transmission oil. Now let me tell you, this is the way to do an oil change! I pulled the 911 on the lift with the back end hanging off so I could get my oil drain under the tank and sump at about chest level. In the picture, you'll notice that once the oil tank under the fender was drained, I put a catch pan on the floor (on the oil case) to catch the last few drips and moved the drain under the sump. Tomorrow, I'm going to replace the cracked breather hose from the oil tank to the throttle body and the worn throttle bellcrank bushings. Perhaps some clay and wax work on the paint if it's rainy.
![[IMAGE]](http://www.darrylsgarage.com/911/oildelta.jpg)
Entry: 3/20/05 - My tasks today took me to the "darkside" of the engine. I had to remove the heater blower and its mounting bracket in order to install new bell crank bushings and replace the cracked and seeping oil tank breather tube on the "back" of the engine. The job was actually quite leasurely thanks to having the car raised on the lift to the point where the back bumper hit me at the waist and I could just reach straight into the engine compartment. With the pinched disc in the lumbar region of of my back, stooping over to do this job would not have gone well at all, the lift is the ticket for "old dogs" like myself. I had to remove all the heater hoses and air cleaner to be able to get my arms around to the "back" of the engine and use a mirror to see what to do back there but everything went smoothly and I had it back together and ready to go in a few hours. After a couple failed attempts at ordering the correct pre-formed hose from Pelican Parts, I just ended-up buying a 3' length of 1" diameter (25.4 mm) heater hose from my neighborhood autoparts store and it worked out just fine. When I had the car into John Walker's shop he pointed out to me that the throttle bellcrank bushings were completely "gone" from the car, either because they were removed or the plastic just finally broke down and they fell out. Either way there is a nice snug set of Weltmeister bronze bushings in there now and zero "slop" in the throttle linkage which should make the foot pedal response much crisper. In the course of reassembling everything, I noticed the rubber vacuum line into the fuel-injection system's warm-up regulator (WUR) was cracked and fit very loose so I replaced it too. Vacuum leaks from the WUR line and the oil breather tube may explain the minor throttle surging problem I am trying to isolate, we'll see. I also started doing the clay and wax detailing work on the hood of the car and will work my way around it while the rainy weather persists, waiting for a dry day for a test drive. I also plan to remove the rockerpanel from the drivers side because of some strange "bumps" in the rubber trim that indicates some rust may be taking place there. I'll grind-off and seal any rust I find and I already have a new rubber trim piece to replace the one with "bumps" just in case it's just a problem with the rubber molding.
![[IMAGE]](http://www.darrylsgarage.com/911/engback.jpg)
Entry: 3/29/05 - I'm back on the rear passenger compartment upholstery tasks again and have installed the right side rear panel that I reupholstered using the black vinyl I found that matched the leather used on the RS style door panels. As you can see in the following picture, the match is quite close. The camera flash really illuminates all the flaws and you can see there are very few. Once the newer style back jump seats are in, most of the pulls in the vinyl will not be visible.
![[IMAGE]](http://www.darrylsgarage.com/911/uphost1.jpg)
I've also finished with the rear deck reupholstery work. The deck was actually out of a targa so I had to add some material to the ends using my now standard window screen and fiberglass technique. I think the padding and vinyl covering turned out very well. I hooked-up the speakers and was very disappointed to find the fader control dialed to "rear" results in silence... yet another thing to tear apart and debug! The left rear side panel and the lower rear center panel are all that remains of this project so I would say I'm well past the half-way point on this task.
![[IMAGE]](http://www.darrylsgarage.com/911/uphost2.jpg)
Entry: 3/31/05 - The reupholstery work is done and all that remains is installation. The driver's side rear wheelhouse panel turned out nicer than the passenger side one. Flash photography really brings out all the pulls in the vinyl which are not as obvious in normal lighting. I'm very pleased with the outcome.
![[IMAGE]](http://www.darrylsgarage.com/911/uphost3.jpg)
The rear speaker shelf / back panel is also done and the glue is drying. I am very pleased with the outcome of this piece too. Snaps are installed at the top for the seatback retaining straps to snap into and the lower panel retention screws are also set into place to fill the holes. The fresh, newer style rear seats bottoms are visible in the picture, later seats had horizontal pleats to match the front seat style... why earlier ones had vertical pleats is beyond me. The carpet on the seat backs have some fading issues which are being worked on, first step a good shampooing, which they are drying from right now. Some spray carpet dye will bring back the deep black color and they will be ready for installation. The seat backs must be installed before the back panel / speaker shelf because the carpet on them tucks under the rear panel. I also figured-out why the rear speakers didn't work the first try... the wires were not attached when I pulled them out! The 35-watt / 4-channel Kenwood stereo sounds great now that there are 4 speakers instead of just 2.
![[IMAGE]](http://www.darrylsgarage.com/911/uphost4.jpg)
Entry: 4/1/05 - It's done all but installing new seat back retaining straps / snaps (on order from Automotion) and gluing down the seat bottoms! I am very pleased with the results of my efforts; a nice clean extension of the Spartan RS style in the back of the cabin.
![[IMAGE]](http://www.darrylsgarage.com/911/uphost5.jpg)
![[IMAGE]](http://www.darrylsgarage.com/911/uphost6.jpg)
The carpet that came on the used 911 SC seats is a bit sun faded, even after an ample coat of black carpet dye. I could replace the carpet, or just cover it with my nice embroidered Lloyds mat.
![[IMAGE]](http://www.darrylsgarage.com/911/uphost7.jpg)
I rather like the look of the embroidered mat and will stick with that for now. I've also been working on a side project, making a gold foil timing information decal for my fan ring. These decals are usually no longer available for most models and if they can be had, cost an insane amount of money, like $20 at the Porsche dealership. My quest was to make the perfect "knock-off" of an original using my HP OfficeJet printer and gold label foil. I found a source for the permenant adhesive gold foil label sheet stock on the Internet and made a copy of the label using Photoshop. I figured out how to make the ink printing on the foil permanent, laminate the label in plastic before cutting it out and removing the backing. That leaves the front of the label covered with a baked-on layer of plastic! I think the results are pretty awesome (in my humble opinion of course!).
![[IMAGE]](http://www.darrylsgarage.com/911/fakefoil.jpg)
Entry: 4/2/05 - This is a bit random and totally off the project plan spreadsheet, but I saw a set of 4 original Porsche OEM "cookie-cutter" style wheels manufactured by ATS (the Porsche OEM brake part supplier) up for bid on eBay a couple weeks ago. The description said they had been professionally restored and polished by a company in California, were never put back on the car and there was no reserve on them. These wheels are the same ones shown on the car in the cut-away drawing at the top of this page and were only available as a factory option on 1973 to 1983 models. I have always liked these wheels for some reason and figured the set was worth about $600 ($150/wheel) to me so I bid that amount on them. Well, I got the winning bid on the set at $510 and they should be here sometime this week. I am planning on taking the Fuchs off the 911 and putting them on my 914, which currently has "fake" Fuchs wheels. The fake ones just don't look right when parked next to real ones in the garage so I've got to do something about that. I plan on putting some Bridgestone S03 Pole Position 205/ZR55 tires, currently very highly regarded by the Pelican Parts BBS Porsche community, on the new cookie-cutter wheels. I think these wheels scream '70s vintage Porsche louder than the Fuchs which will look much more at home on my 914. This is one of the benefits of having two Porsches with the same wheel bolt pattern, I can always switch back when I want a new look.
![[IMAGE]](http://www.darrylsgarage.com/911/cookie1.jpg)
Entry: 4/15/05 - How about the new look? New 205/ZR55 Bridgestone Potenza S-03 Pole Position tires mounted on the polished 6Jx15 ATS Cookie-Cutter wheels with new satin polished lug nuts and the original center caps make a great new, slightly custom look.
![[IMAGE]](http://www.darrylsgarage.com/911/new-ccs1.jpg)
Close-up views of the front and rear wheels show how nicely the satin finish on the lug nuts and center cap compliment the polished mag. These wheels were originally painted one of 4 colors in the center; black, gold or silver and a special edition color in 1976. On the 1976, "Ferry Porsche" signature version of the 911, the centers were painted to match the car, metallic platinum silver. By polishing the entire face of the wheel you get nice variation on what is commonly seen, custom look yet stock and period correct... how cool is that? All that is lacking now is a nice set of Zimmerman drilled rotors clearly displayed through the slots in the mag wheels!
![[IMAGE]](http://www.darrylsgarage.com/911/new-ccs2.jpg)
![[IMAGE]](http://www.darrylsgarage.com/911/new-ccs3.jpg)
Entry: 5/10/05 - I've been working on the last few tweeks I want to make to this 911 before I declare the restoration "DONE!" First of all, I've driven 911s for years and always looked at the oil tank level indicator that shares the fuel tank level gauge on the far left side of the dashboard as prime real estate wasted by an untrustworthy gauge that tells you the same thing as the always correct oil dipstick. I saw that North Hollywood Speedometer and Clock offered to convert this worthless gauge into something truly valuable to the driver, a volt meter! Having been left stranded by a failed voltage regulator in Tofino, British Columbia by my first 911SC, I vowed to do something about it on this 911 and here is the result:
![[IMAGE]](http://www.darrylsgarage.com/911/voltgage.jpg)
I also didn't much care for the faded black carpet on the backs of the rear seats so I took a close look at the original carpet on the blue vinyl seats that were in the car when I started. The carpet was in great shape (aside from the abundant white pet hair) but the vinyl binding was cracked and splitting. Well, I took those carpets off the old seats and dropped them off at my nearby auto upholstery shop where I buy all my materials from. They were able to re-bind the carpet edges for $50, which is a great way to keep all matching carpet in the interior. I will have to remove the seat backs and glue and tack the new carpets on, plus I have new leather snap straps to install so it's a rather fun little project. I think the new binding turned out great in the following photo:
![[IMAGE]](http://www.darrylsgarage.com/911/binding.jpg)
Entry: 5/22/05 - It's looking like I'm just about out of things to do on this project before declaring it done. There were some nasty looking rust bubbles on the bottom side of the engine lid when I got the car. I removed the lid and took my Dremmel tool grinder to get all the rust scales off, treated with Rust Mort, sealed with Eastwoods Rust Encapsulator, filled with red spot putty and painted with my Plasti-Cote silver touch-up paint. I think the before-and-after shots pretty much speak for themselves:
![[IMAGE]](http://www.darrylsgarage.com/911/911rust1.jpg)
![[IMAGE]](http://www.darrylsgarage.com/911/911rust3.jpg)
![[IMAGE]](http://www.darrylsgarage.com/911/911rust2.jpg)
![[IMAGE]](http://www.darrylsgarage.com/911/911rust4.jpg)
I also stapled the re-binded carpets to the back of the folding back seats. They look much better than the sun-faded carpet that came on the black vinyl rear seats I installed to replace the navy blue ones that came in the car.
![[IMAGE]](http://www.darrylsgarage.com/911/911bks1.jpg)
The before-and-after photos of the back seats show that the black vinyl seats have horizontal pleats like the front seats and that the seat belts have been removed. I doubt very much anybody will ever be riding back there anyway! I rather like the newer black seats and could never understand why the originals had vertical pleats in the rear and horizontal ones in the front???
![[IMAGE]](http://www.darrylsgarage.com/911/911int4.jpg)
![[IMAGE]](http://www.darrylsgarage.com/911/911bks2.jpg)
I've acquired the necessary metal ductwork off eBay to "backdate" the engine heater hoses to get rid of the blower and that big silver hose that goes over the top of the fan housing. Earlier engines didn't use the electric blower fan and I like the cleaner, less cluttered engine compartment. Stay tuned for that project once the parts arrive.
Entry: 9/29/05 - I've been toying with the idea of restoring the correct euro-style narrow rubber bumper guards originally found on my 1974 911 and found a pair of good used ones on the Pelican Parts used parts BBS. A trip down to visit the "water-walking" 911 mechanic I worship, John Walker at his shop, John Walker's Workshop in search of an extra rear bumper also resulted in stumbling across a fine looking fiberglass ducktail spoiler he had for sale that fit perfectly on one of his 911s. So now I have to have my buddy weld-up a couple holes in the aluminum rear bumper to fill the holes from the fatter 911SC bumperettes. Funny thing, the holes were already drilled for the earlier narrow euro-style ones on the bumper I got from John Walker... perhaps it's a '74 that got retrofitted with the SC bumperettes? Who knows? I'd also like to find a pair of paintable H4 headlight rim covers before running all these pieces up to my favorite bodyshop for a coat of silver metallic to match the rest of the car. I'd like to keep the original style engine lid and swap back and forth between the ducktail and the original as the mood suits me. My car doesn't have the flaired rear fenders and fatter rear tires found on the original 1974 Carerra and I would never consider the "Carerra" side-stripe, but I think the ducktail and narrow rear bumperettes will still really intimidate the young "rice-rocket" jockeys in my neighborhood! Hee-hee!
![[IMAGE]](http://www.darrylsgarage.com/911/911duck.jpg)
![[IMAGE]](http://www.darrylsgarage.com/911/911euro.jpg)
Entry: 5/4/06 - Now that warm weather is back and I'm getting to a point where I can move the 912 project off the 4-post lift for a bit, the 911 needs some love. I decided it was time to get the new '74 Carerra style duck tail, Euro-style narrow bumperette rear bumper, rear apron and color-matched headlight rims prepped and off to my favorite bodyshop for a coat of silver metallic paint. I picked them up today and they turned-out beautiful. I'm waiting on some new rubber "accordian" boots for the ends of the bumper and some other small bits required to mount them. I will definitely need the car on the lift to get at the underside of the bumper. I can't wait to see how the new rear-end treatment looks all put together!
![[IMAGE]](http://www.darrylsgarage.com/911/911mods1.jpg)
Entry: 5/9/06 - Today I finished installing the new rear bumper, duck tail and color-matched headlight rings. I had to make an emergency trip down to John Walker's Workshop to pick-up a used bumper impact strip as the studs were twisted-off on the old one in the course of removing it from the old bumper. John had everything I needed and I got to watch him put an engine back into an SC coupe which was very educational to see how a pro does it. The new duck tail fits pretty good, the gaps are a bit big but I was able to center it in the opening with a couple hours of work adjusting it. I think the new look is a nice change, the painter did a great job of matching the existing paint and it blends in like it was all done at the same time. I still need to remove the battery and do a periodic clean-up of the battery well up in the front of the car and will take the car back to the Aldercrest Auto Rebuild bodyshop in Lynnwood tomorrow to show the owner how nice everything turned out once assembled and thank his crew again for doing such a great job for me once again.
![[IMAGE]](http://www.darrylsgarage.com/911/911duck1.jpg)
![[IMAGE]](http://www.darrylsgarage.com/911/911rings.jpg)
Entry: 5/10/06 - I had one more task on my list I wanted to accomplish before rolling the 911 off the lift, cleaning-up the battery tray. I also wanted to wire up the battery so I could plug in my "Battery Tender" maintenance charger without having to use the alligator clips. Well, once the battery was out, it became clear that I needed to deal with some surface rust that was starting to get under the rubberized undercoating on the top of the battery tray. I scraped away as much of the undercoating as I could using a wood chisel, then wire brushed all the surface rusted areas. Once I was happy with the prep work, I applied SEM Rust Seal to the rust spots. Once that had dried, three nice thick coats of silver "Hammerite" were sprayed over the complete battery tray to seal it from acid and moisture. I wanted to take the car out for a drive today but it will have to wait until the Hammerite has cured a bit. I don't think I'll have to worry about the battery tray rusting for a few decades now!
![[IMAGE]](http://www.darrylsgarage.com/911/911batt.jpg)
Entry: 5/14/06 - Today I showed the 911 at the No-Gruppe Porsche Show-n-Shine at the XXX Drive-in down in Issaquah and as you can see in the photo below, the weather was spectacular. The new duck tail and bumper really look great out in the sunlight and while I didn't get a trophy, there were several business cards left under the wiper blades to call in the event the car was for sale in the near future... which I consider to be quite the compliment. I was able to meet several people whom I've conversed with on-line and saw some old faces as well. To get away to a car show on Mother's Day is quite a testimony to my wife's support of my car hobby, which was rewarded with a big skillet of my specialty, chicken fajitas this evening. This should wrap-up my 911 upgrades for this summer and now I can get back to work on my '66 912 Porsche project. again.
![[IMAGE]](http://www.darrylsgarage.com/911/911atXXX.jpg)
Entry: 6/26/06 - EUREKA! I finally found the parts I need to backdate my heater ducting to get rid of the engine compartment blower fan! I found a nice rust-free set of '70 engine tins from a 2.2 liter engine on eBay and can proceed with modifying the left side duct to clear the larger 3.0 distributor. John Walker has performed the mod (as shown in the second picture) many times and I was able to borrow a template of where to make the cut from him. Basically I'll need to cut out the circular section and then get out the tin-snips to fit a new piece of metal in the opening and then MIG weld it into place. This will really clean-up my engine compartment and make the engine more accessible. It will also get rid of that big silver hose that goes over the top of the fan housing. I had won a set from a shady character going by the name of "unclezak" on eBay a year ago but they never materialized despite multiple promises. I had to petition PayPal to get my money back and I kept searching. I can't tell you how hard to find these parts are but the fact I've been searching diligently for over a year should say something!
![[IMAGE]](http://www.darrylsgarage.com/911/backdate.jpg)
![[IMAGE]](http://www.darrylsgarage.com/911/ductmod.jpg)
Entry: 7/10/06 - Over the last couple weeks, I've modified the left side tin heater duct to accommodate the larger 3.0 distributor. Once the welding was complete, the tin pieces from both sides were media blasted and painted with high temperature engine paint and allowed to cure for several days. Here's how they turned-out once they were ready to install:
![[IMAGE]](http://www.darrylsgarage.com/911/911bkdt2.jpg)
Today I performed the heater backdate and you can see the big reduction in engine compartment clutter. That extra blower and hoses really added up to alot of things to remove to perform routine tasks like tune-ups and throttle adjustments. Here's the before and after shots:
![[IMAGE]](http://www.darrylsgarage.com/911/911bkdt1.jpg)
Entry: 9/27/09 - I took the 911 out for a wonderful 2 hour drive this morning. The drive made me motivated to spend some time "giving it some love" after neglecting it over the 912 project for the last 3 years. I had been putting off the ugly task of installing a NOS passenger door latch for several years now and this was keeping me from taking passengers for drives. The old one has always hung up if you open the door from the inside, keeping the latch mechanism from springing back and making it difficult to get the door to latch again. I found the NOS latch on the Pelican Parts BBS "Used Parts Classifieds" and it's beautiful. After about 4 hours pleasantly spent listening to the Seahawks lose to Chicago, the job is all done and the latch works perfectly. While I had the car on the lift I also finally aligned the drivers side door so it closes perfectly flush with the rear edge.
![[IMAGE]](http://www.darrylsgarage.com/911/911pdor1.jpg)
![[IMAGE]](http://www.darrylsgarage.com/911/911dot.jpg)
Entry: 8/26/14 - This 911 has consistently been my favorite car to drive for a long time and only one problem has been impacting that enjoyment, the transmission popped out of 1st gear if I'm not extremely careful to shift it into 2nd gear before shifting it into first when I come to a dead stop. Also the values of air-cooled Porsches has risen enough in the time I've owned this car to justify the investment of a complete 915 transmission rebuild by the local master (Doctor) John Walker. The question of how many more years Doctor John will be working on Porsches also motivates me to get this job done now while I have a trusted and competant expert so accessible. So I turned the car over to John and told him do whatever it needs which came to the tune of $4,341.68 with 10 hours of his labor. As you can see from the laundry list of parts from the invoice, all new (5) synchro rings, new 1st and 2nd gears, new shift sleeves 1st thru 4th, brand-new flywheel and clutch kit , set of seals, gear oil and engine oil and filter change (since he had to pull the engine too). Now the car shifts like butter, no popping out of gear and even more of a joy to drive. I've adopted the attitude that all the cars in my collection should have no obvious problems which would force me to sell them at a discount when the day comes that I must let them go and while it's more fun to spend $4000 on a new project, this investment will more than pay for itself eventually as well as add more enjoyment now as I'm getting older and know that it's time to savour the fruits of ownership of such a fine automobile.
![[IMAGE]](http://www.darrylsgarage.com/911/911jwbill.jpg)
Entry: 5/19/17 - Over the last couple years I've noticed the amount of smoke on start-up has become more severe. Once the car is warmed up, the smoke completely stops and it only happened when the car sat for over a couple weeks between drives. I'd seen that Rothsport Racing made a "check valve" that was designed to keep oil from seeping back into the engine case from the dry-sump system's oil tank. I talked to John Walker about it and he said it's normal for cars my age and that and the only reason it could be is oil filling up the crankcase to the point where it's reaching the piston rings and the nature of cylinder scoring draws the oil past the rings and into the the cylinder. My buddy Jack Morris sealed the deal when he told me that the early 4-cam Carrera engines had that problem in spades because the oil tank was so high that gravity assisted the seepage so the factory came up with a check valve to do exactly the same thing as this Rothsport Racing product. So I ordered the new check valve and a new "S tube" from Pelican Parts. When it got here, I was really underwhelmed by the cheap radiator-style hose clamps that came with the kit so I ordered a set of the beefy stainless-steel ones the factory used so $400 later, all four of the clamps are exactly the same and it's all tucked up in there nice and business-like. I decided the check valve was best situated close to the tire so debris thrown up from the road wouldn't hit it, it also stayed well away from the high pressure line running parallel to it beside the heat exchanger. A new oil filter and 11 quarts of Swepco 306 20W/50 oil and a quick test drive shows no leaks and now to sit a bit before starting it again to see if the smoking problem is gone.
![[IMAGE]](http://www.darrylsgarage.com/911/rothsport1.jpg)
![[IMAGE]](http://www.darrylsgarage.com/911/rothsport2.jpg)
Entry: 5/1/21 - What I love about owning a car for decades is that it can evolve as my tastes evolve. I was starting to get tired of the polished cookie-cutter wheels and wanted a more contemporary look like the popular "backdated" 964 Singers. I replaced the cookie-cutters with traditional Fuchs like originally came on the car but with the proper annodized finish and added a Porsche racing stripe in the Singer stripe size and contrasting color of black with red letters. This also ties into the interior with the black and red accents and with the addition of new Rennsport brushed aluminum window cranks ties in with the silver Momo steering wheel. I'm pretty happy with the transformation it made to the car and like all things I do to my cars, completely reversible with patience, solvent and a heat gun!
![[IMAGE]](http://www.darrylsgarage.com/911/oldwheels.jpg)
![[IMAGE]](http://www.darrylsgarage.com/911/newwheels.jpg)
![[IMAGE]](http://www.darrylsgarage.com/911/singer.jpg)
![[IMAGE]](http://www.darrylsgarage.com/911/rennsport1.jpg)
![[IMAGE]](http://www.darrylsgarage.com/911/latest911.jpg)
Entry: 8/4/23 - Over the last couple weeks I've been restoring the front brakes which after years of use started to produce a pulsing sensation at the brake pedal like a rotor was warped. There were also some deep grooves worn into the rotors from stones being thrown up from the road and lodging between the pads and the rotor surface. Initially I planned on just rebuilding the aluminum 'S' brake calipers but a member of my local Porsche club saw what I was up to and for just the cost of the rebuild (no core charge) offered me a set of already rebuilt ones he got from PMB Performance but didn't use, opting for four piston Wilwood calipers. So the process began with disassembling everything down to the struts and cleaning them thoroughly with mineral spirits and carburetor cleaner. Once everything was spotless, I painted them with Dupli-Color's Chevrolet Orange DE1620 engine paint, which is a perfect match to the color Koni originally painted the '74 Porsche 911's front struts. The lower control arms were simply brush painted with gloss black Rustoleum. The aluminum hubs were first vapor honed and then I "chucked them up" in my drill press and "dressed" them to a shine using a wire brush. The lug nut threads were masked during the vapor honing phase but the backs of the wheel studs required corrosion protection by brushing on high temperature clear engine paint. The brake shields were originally gold anodized finish but all the replacement ones on the market are black so I used semi-gloss high-temperature engine paint to refinish them after vapor honing all the gold plating off. The centers of the new rotors got a coat of smoke gray Rustoleum to protect them from corrosion. All the new parts orders were placed so all new wheel bearings, brake lines and hoses, brake hose clamps, copper banjo fitting washers, rotors, pads and new gold cadmium plated hardware from Belmetric.com. I let all the freshly painted parts sit for a week to cure and harden before reassembly. Of course I love to lay everything out like an exploded parts diagram before reassembly so I know nothing is missing. Now it's time for reassembly, the perfect activity for a hot summer afternoon with the shop ceiling fan on high and the temperature in the low 70s while it's nearing 90 outside.
![[IMAGE]](http://www.darrylsgarage.com/911/newfrbrks1.jpg)
![[IMAGE]](http://www.darrylsgarage.com/911/newfrbrks2.jpg)
![[IMAGE]](http://www.darrylsgarage.com/911/newfrbrks3.jpg)
![[IMAGE]](http://www.darrylsgarage.com/911/newfrbrks4.jpg)
![[IMAGE]](http://www.darrylsgarage.com/911/newfrbrks5.jpg)
![[IMAGE]](http://www.darrylsgarage.com/911/newfrbrks6.jpg)
![[IMAGE]](http://www.darrylsgarage.com/911/newfrbrks7.jpg)
![[IMAGE]](http://www.darrylsgarage.com/911/newfrbrks7b.jpg)
![[IMAGE]](http://www.darrylsgarage.com/911/newfrbrks8.jpg)
![[IMAGE]](http://www.darrylsgarage.com/911/newfrbrks10.jpg)
![[IMAGE]](http://www.darrylsgarage.com/911/newfrbrks12.jpg)
![[IMAGE]](http://www.darrylsgarage.com/911/newfrbrks13.jpg)
![[IMAGE]](http://www.darrylsgarage.com/911/newfrbrks14.jpg)
Entry: 9/10/23 - So those rebuilt calipers I bought from a local Porsche club member turned out to be a total waste of over a month. When I went to attach the banjo bolts, the threads in the caliper were so loose I could wiggle the banjo bolt when it was fully threaded and of course it stripped when I went to tighten it. No biggie, I just installed some M10 x 1 helicoils and solved the problem. Then once installed and the brake fluid added, it ran out thorugh the crossover pipe brake line fittings and I found those stripped as well. So long story short, I ordered a set of new production aluminum S calipers from Stoddard for $720 for the pair with my discount. My delight when they arrived was quickly dampened when I closely inspected them and discovered the pistons were clocked 180 degrees off, or the crossover pipe and bleeder nipples were reversed, not sure what the production error was.
![[IMAGE]](http://www.darrylsgarage.com/911/newfrbrks14b.jpg)
![[IMAGE]](http://www.darrylsgarage.com/911/newfrbrks15.jpg)
![[IMAGE]](http://www.darrylsgarage.com/911/newfrbrks16.jpg)
Removing and reclocking the pistons seemed to be the safest leak-free solution over reversing the crossover pipes and bleeder nipples but I had to remove the tight-fitting rubber dust seals and most were damaged in the process. I ordered a set of legit OEM ATE rebuild kits to get new seals and re-clocked all 4 pistons correctly with new ATE dust seals. I cut a block out of oak that fit the caliper opening perfectly and used C-clamps to hold one piston in while using compressed air through the banjo bolt hole to push out the caliper on the other side. I cleaned and lubed the pistons and cylinders with Wurth Assembly Lube and everything slipped easily back together by hand with little pressure using the oak block for leverage.
![[IMAGE]](http://www.darrylsgarage.com/911/newfrbrks16b.jpg)
![[IMAGE]](http://www.darrylsgarage.com/911/newfrbrks17.jpg)
![[IMAGE]](http://www.darrylsgarage.com/911/newfrbrks18.jpg)
![[IMAGE]](http://www.darrylsgarage.com/911/newfrbrks19.jpg)
![[IMAGE]](http://www.darrylsgarage.com/911/newfrbrks20.jpg)
![[IMAGE]](http://www.darrylsgarage.com/911/newfrbrks21.jpg)
When I installed the calipers and added brake fluid to flow by gravity to the calipers with the bleeder nipples cracked slightly open. After it seeped from the bleeder nipples, closing them took an alarming amount of torque to get to seal but once they stopped leaking they were easy to reseal later while power bleeding. The power bleeding went without any issues and I quickly had a set of calipers that held pressure with no leaks, functioned perfectly, a rock hard brake pedal and a happy mechanic! Now I'm ready to test drive and bed the new brake pads by taking it easy on them for the first 250 miles.
![[IMAGE]](http://www.darrylsgarage.com/911/newfrbrks22.jpg)
![[IMAGE]](http://www.darrylsgarage.com/911/newfrbrks23.jpg)
![[IMAGE]](http://www.darrylsgarage.com/911/newfrbrks24.jpg)
![[IMAGE]](http://www.darrylsgarage.com/911/newfrbrks25.jpg)
![[IMAGE]](http://www.darrylsgarage.com/911/newfrbrks26.jpg)
Entry: 9/13/23 - I was glad I let the car sit for another night with the wheels off because the left inboard bleeder nipple was still seeping slightly. I gave it just a little more torque to tighten it and watched it again overnight. I have to say, working on aluminum calipers make me nervous after experiencing the stripped fittings on those replated, restored PMB calipers. The only explanation with how easily the threads stripped on those PMB rebuilds is that the "pickling" acid dip they do to strip the original gold cadmium plating off to prep the parts for replating with yellow tinted zinc strips the anodized layer off. What works great on cast iron calipers turns aluminum ones into junk. These brand new gold annodized ones from Stoddards would have been fantastic had they been assembled correctly from the factory and I hadn't had to spend the addition money for two ATE rebuild kits and rework the factory mistakes. I took the car out for a drive on my favorite local road for 60 miles to break in the new rotors and pads. The first few stops were quite noisy, "growling" as the protective coating was worn off the rotors but soon everything was quiet, no squealing, straight stops and a firm brake pedal. Stopping distance was a bit further but that's normal until the pads are bedded. So this closes the book on my front brake rebuild project and I've mastered the art of helicoils, brake piston extraction and clocking, and not scaring the FedEx driver when I run to meet his truck when part and tool orders finally arrive!
![[IMAGE]](http://www.darrylsgarage.com/911/newfrbrks27.jpg)
![[IMAGE]](http://www.darrylsgarage.com/911/newfrbrks28.jpg)
![[IMAGE]](http://www.darrylsgarage.com/911/newfrbrks29.jpg)
Entry: 10/1/23 - I upgraded the painted to match the car mirror on my 1974 Porsche 911 to a black anodized version originally found on the Carrera 2.7 RS. Until recently my only option was a new chrome one but I wanted to match the trim on the car which had been powder coated black by a prior owner. Sierra Madre Collection just started offering the black Carrera 2.7 RS version. This also cures a clouded mirror problem on the old one. I struggled to get the M6 cap screw to thread in the rear hole without cross-threading the soft aluminum base threads because it's accessed at an odd angle. Eventually I got fed up and ran down to my local hardware store and bought a proper long reach 5 mm ball hex socket driver and it threaded right in. Starting with the back cap screw worked best, holding it in the hole from the backside and then lining the base up with it from the outside, the front cap screw is a straight shot.
![[IMAGE]](http://www.darrylsgarage.com/911/newmirror1.jpg)
![[IMAGE]](http://www.darrylsgarage.com/911/newmirror2.jpg)
![[IMAGE]](http://www.darrylsgarage.com/911/newmirror3.jpg)
![[IMAGE]](http://www.darrylsgarage.com/911/newmirror4.jpg)
![[IMAGE]](http://www.darrylsgarage.com/911/newmirror5.jpg)
![[IMAGE]](http://www.darrylsgarage.com/911/newmirror6.jpg)
Entry: 10/11/23 - Last spring I purchased a set of "better" front tow hooks from mattman1955 on eBay for $63.75 each. While they were good, they weren't perfect, each having a slight bit of "road rash" on them that needed to be fixed. Later in mid August I proceeded to make a wooden "slag shield" and MIG welded fresh steel into the void ground off from contact with the pavement. Initial rough shaping was done on my 12" diameter sanding disc using an 80-grit adhesive disc, followed by fine shaping with an 80-grit drum sanding attachment on my Dremel tool. Once satisfied with the restored shape, sanding marks were filled with a coat of JB Weld and further sanded smooth with fine grit sandpaper, followed by fresh semi-gloss engine enamel. Finally now in October I went ahead and detailed the front pan area and gas tank with a parts brush and mineral spirits before installing the "new" tow hooks with new gold cadmium hardware from Bellmetric, torqued to 57 foot pounds. To say the old ones were in bad shape would be putting it mildly but the results with the new ones installed looks like this car has had a very easy life and I hope to keep it that way!
![[IMAGE]](http://www.darrylsgarage.com/911/towhooks1.png)
![[IMAGE]](http://www.darrylsgarage.com/911/towhooks2.jpg)
![[IMAGE]](http://www.darrylsgarage.com/911/towhooks3.jpg)
![[IMAGE]](http://www.darrylsgarage.com/911/towhooks4.jpg)
![[IMAGE]](http://www.darrylsgarage.com/911/towhooks5.jpg)
![[IMAGE]](http://www.darrylsgarage.com/911/towhooks6.jpg)
![[IMAGE]](http://www.darrylsgarage.com/911/towhooks7.jpg)
![[IMAGE]](http://www.darrylsgarage.com/911/towhooks8.jpg)
![[IMAGE]](http://www.darrylsgarage.com/911/towhooks9.jpg)
![[IMAGE]](http://www.darrylsgarage.com/911/towhooks10.jpg)
Entry: 10/30/23 - Hat's off to Matt Gibson at All City Convertibles and Customs upholstery shop in nearby Kirkland, Washington. The foam padding in the driver's seat bottom was starting to collapse and the vinyl welt wearing through on the back cushion with black paint used in an attempt to hide the damage. Matt was able to replace all the vinyl welts with leather ones around the perimeter of both the bottom and back cushions. He fully disassembled the bottom cushion to sew in new listing material to tighten everything back up over some new foam padding. All that improvement for just 5 hours labor at a shop rate of $140/hour and a lot of experience repairing old Porsche seats.
![[IMAGE]](http://www.darrylsgarage.com/911/frseatfix1.jpg)
![[IMAGE]](http://www.darrylsgarage.com/911/frseatfix2.jpg)
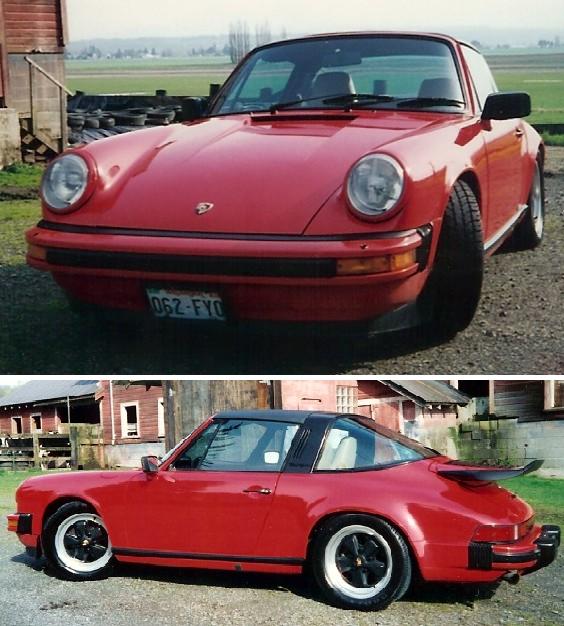