![[IMAGE]](http://www.darrylsgarage.com/912/912dream.jpg)
![[IMAGE]](http://www.darrylsgarage.com/912/912DEC06.jpg)
Darryl's 1966 Porsche 912
DECEMBER 2006 PROJECT JOURNAL ENTRIES (IN CHRONOLOGICAL ORDER)
Entry: 12/2/06 - Today's big task was turning the car around on the 4-post lift to work on the left side. Since rolling the car outside is necessary to accomplish this task, I had to wait until the weather cooperated with clear skies and no rain. It is very cold though, just above freezing today so having the shop open left all my heat out and it's just too uncomfortable to work, I'll get the shop warmed back up to the usual 55° F, which is quite comfortable when I'm doing physical work like hand sanding. I'm still planning on pulling off the right front fender to strip it, clean and undercoat the inside and fix any small rust areas I encounter. I'm also planning on cleaning and undercoating the right cowl area too, as well as re-do the undercoating on the clip graft area of the nose, using my now perfected "faux factory undercoating" technique. The silver colored zinc primer on the left fender, door and rockerpanel will need to be stripped and reprimed with the red-oxide colored metal etching primer I used on the right side. Not a big deal, just a little additional mess since it comes right off with any generic aerosol carburetor cleaner, paper towels and a wire brush... as it turnes out, it's actually easier to remove the zinc primer than remove flash rust had I left it bare steel! Now that I'm back in practice doing filler / block sanding work, this side should go much faster than the right side did.
![[IMAGE]](http://www.darrylsgarage.com/912/912LDOR1.jpg)
Entry: 12/4/06 - Finally, the frigid clear weather has given way to our usual warmer, cloudy weather so I could finally use the hose and let the water run down the driveway without fear of creating a bobsled run when it froze! Stripping all the silver colored zinc primer on the left doorframe, inner door and rockerpanel went fairly quickly using generic carburetor cleaner and paper towels. Once that task was done, it was time to remove that left door and strip the paint in preparation for filling and block sanding. I used the usual aircraft-style automotive paint stripper and once all the paint was gone and a thorough hose-down with hot soapy water to remove all traces of the chemical stripper, it was time to stabilize the bare steel on the door and rockerpanel using Eastwood Company's Metal Wash which etches the surface and prevents flash rusting for up to 3 weeks. Tonight the door sits over my electric heater and the rockerpanel is getting the dual 500-watt halogen light heat to dry out all traces of the water. Next task will be filling and block sanding the inner door frame... it's like a mirror-image deja-vu!
![[IMAGE]](http://www.darrylsgarage.com/912/912LDOR2.jpg)
Entry: 12/5/06 - Prepping the left inner door frame for paint was todays objective. One of the screw holes for mounting the vinyl-covered door panel appeared damaged. I thought I should verify its location by setting the door panel on the door and sure enough it was a good catch to find this problem now before paint. It was also quite enlightening to see the amount of door paint that will show when the panel is installed and how much attention I should pay to my work in that area. I also figured-out that the "bungee cord" that holds the door pocket up should actually hook into two of the clip-sized holes in the inner door frame.
![[IMAGE]](http://www.darrylsgarage.com/912/912LDOR3.jpg)
So in photo "A:" you can see the door panel screw hole has been stripped, looking even closer I saw there is a very fine 1" long crack running straight down out of about the 7 o-clock positon of the large hole along where the latch reinforcement plate meets the sheet of steel the screw hole is in. A little MIG welding, grinding and drilling later and you have photo "B:" where the screw hole has been welded-up and re-drilled, the crack welded-up and the small rust hole above the large hole has been filled. Photo "C:" shows the repair after filling the grinder marks and priming. Now the door panel will stay put!
![[IMAGE]](http://www.darrylsgarage.com/912/912LDOR4.jpg)
Once the welder was put away, it was time to fill and block sand all the dressed welds I had done to fix the rust. I filled the grinder marks with Evercoat Rage Xtreme lightweight filler and block sanded it with 80-grit sandpaper. Once that was smooth, I filled the sandpaper marks with Evercoat Polyester Glazing Putty and block sanded that with 180-grit sandpaper. After a couple interations with the glazing putty, it was time for a thick coat of Spies Hecker Priomat Primer 3255 self-etching primer and as the following photo shows, tonight the door sits by the heater drying. Next step is filling and block sanding of the door skin! I'll come back to fix the remaining blemishes on the inner door frame with red-oxide colored spot putty once the door is hung on the car.
![[IMAGE]](http://www.darrylsgarage.com/912/912LDOR5.jpg)
Entry: 12/6/06 - Today started with scuffing the bare metal surface with a 50-grit sanding disk on my 4˝" angle grinder to create the random pattern seen in the following photo. The autobody manuals I've studied advise this as the best approach to prep the surface to give the filler coat the best possible mechanical and chemical bond with the surface.
![[IMAGE]](http://www.darrylsgarage.com/912/912LDOR6.jpg)
I got a pretty good start on filling and block sanding the entire outer door skin. I'm done using the Evercoat Rage Xtreme lightweight filler and 80-grit paper on my sanding board and can see the metal starting to "ghost" through in many points indicating a very thin coverage of filler. Next I'll start with the glazing putty and 180-grit paper to fill the sanding marks in preparation for high-build filler primer later. Now that I'm back in practice I was able to get things finished with fewer iterations... faster but still no where near the pros speed at doing this stuff!
![[IMAGE]](http://www.darrylsgarage.com/912/912LDOR7.jpg)
Entry: 12/7/06 - Finishing up the left door was today's objective. I did a little bit more block sanding of the filler using 80-grit sandpaper before breaking out the Evercoat Polyester Glazing Putty to fill the low spots and sanding marks by block sanding it out with 180-grit sandpaper. As you can see in the following photo, much of the door shows "ghosting" of the underlying sheetmetal, where the filler is so thin, it's turning from light blue to white and is almost transparent after final block sanding. I've been asked why would anybody want to cover the entire door with filler? Well, this technique was taught to me by the professional bodyman who painted my 914 years ago. Over the years, the filler material shrinks slightly and shows through the paint as sink marks, where the "feathering" lines between filler and metal form rings that look like a topographical map under certain light conditions. By spreading a thin layer of filler over the entire panel and avoiding sanding through it to the bare metal, there is no distinct feathering line so when the filler shrinks, no sink marks will ever be visible. I didn't realize this is now standard practice at professional bodyshops on old cars taken down to "bare metal" for repaint jobs. I must say, after 12 years, my 914's doors still maintain a perfect mirror reflection, something I'd like to achieve with this 912's paint job too.
![[IMAGE]](http://www.darrylsgarage.com/912/912LDOR8.jpg)
I tried something different today, I instead of laying the door flat to prime it, I hung it from the 4-post lift so I could spray horizontally and achieve more uniform coverage with less overspray. I primed the entire door with a thick coat of Spies Hecker Priomat Primer 3255 self-etching primer and will let it hanging overnight to dry. Next I will work on the A-pillar and fender mounting bulkhead, which need to be stripped, filled and primed. The lockpost will also need to be filled and block sanded as I work my way towards the quarterpanel.
![[IMAGE]](http://www.darrylsgarage.com/912/912LDOR9.jpg)
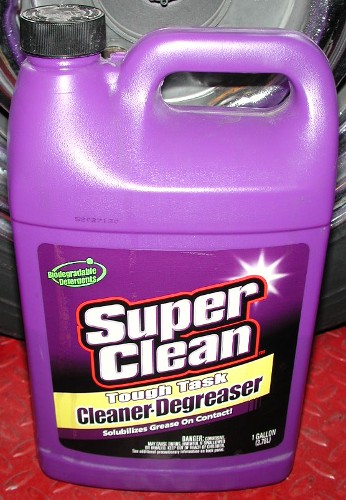
Entry: 12/9/06 - The first task for today was removing the two front fenders and rolling the car off the lift so I could clean and degrease the right front wheelwell with scalding hot water and my favorite purple "SuperClean" biodegradable degreaser. Cleaning went quite well, so now I'll perform my "faux factory undercoating" on the right nose where I repaired it last January and simply undercoated it with Wurth High-Build Underseal. Now that I've perfected my factory undercoating patch skills, I can go back and re-do that area with better results. I'll also touch-up the now clean factory undercoating at the rear of the wheelwell with a thick coat of fresh black undercoating after spot sandblasting away some surface rust at the top of the cowl just ahead of the fender mounting bulkhead.
![[IMAGE]](http://www.darrylsgarage.com/912/912RFND8.jpg)
Once I got the car back on the lift after cleaning the wheelwell, I stripped the paint on the replacement right front fender off the '68 donor car and the left A-pillar. Stripping paint is a test in patience, and after 5 coat + scrape + re-coat iterations, it was finally bare metal. I hosed the fender down with scalding hot water and then rinsed it with Eastwood Company's Metal Wash. All traces of the paint stripper used on the upper section of the A-piller was completely rinsed with carburetor cleaner, since I needed to remove the silver colored zinc weld-thru primer from the lower section with carburetor cleaner anyway. So tonight the right front fender sits drying and waiting for some spot sand blasting and rust repair. Good news is the fender looks to be quite solid and only surface rust so the welding required will be minimal. I think I'll get both front fenders prepped for paint and mounted before starting on the left rockerpanel/quarterpanel filler and block sanding, since it's dependent on fitting the door to fender gap.
![[IMAGE]](http://www.darrylsgarage.com/912/912RFND7.jpg)
Entry: 12/10/06 - Today's efforts were divided between the right front wheelwell and right front fender. The wheelwell needed some spot sandblasting attention paid to the cowl area just ahead of the fender mounting bulkhead, at the top where dirt had accumulated and retained moisture over the years. Luckily surface rust was all the damage done, no rot-thru, so after blasting, a coat of SEM Rust Seal to neutralize any remaining rust followed by A thick coat of black Eastwood's Rust Encapsulator to further seal the area. I then turned my attention to re-doing the undercoating in the collision repair area on the right front nose. A finger-tip "dabbed" coat of tan 3M seam sealing caulk created the desired random splatter pattern of the "faux factory undercoating" technique I've been perfecting over the last few months.
![[IMAGE]](http://www.darrylsgarage.com/912/912RFND9.jpg)
Once everything had dried thoroughly, I gave the entire wheelwell area a fresh coat of Wurth High-Build Underseal. The following photo shows how it looks all dried and with the masking removed. I cannot detect the seam between the original undercoating and the "faux factory undercoating" from any angle, so when I get the fender back on the car, it will really be difficult to see anything has been repaired!
![[IMAGE]](http://www.darrylsgarage.com/912/912RFNDA.jpg)
Between tasks on the wheelwell, I started spot blasting and rust prospecting on the right front fender. One thing I wanted to do while the fender was off the car was tack a small amount of steel on the very tip of the trailing edge where it meets the top of the door. The gap was not uniform and didn't meet the windshield column as it should since this used replacement fender had been fit to a different 912. I had drawn a pattern showing the rough size of steel that needed to be added. After making sure no lead solder was lurking there with my propane plumber's torch, I took a piece 3/32" steel oxy/acetylene type welding rod, formed and clamped it to the edge of the fender in preparation for welding it on. As you can see in the following photo, the welding rod clamped on and how it looked after welding and dressing with my Dremmel tool. I made it slightly larger than required so I can do final shaping to form a uniform 3mm door gap once the fender is bolted back on the car... can't miss any of these important factory original details.
![[IMAGE]](http://www.darrylsgarage.com/912/912RFNDC.jpg)
The only badly rotten spot on the replacement fender was at the very bottom of the fender mounting flange where it joins the bottom of the mounting bulkhead on the cowl of the car. This section is critical in maintaining alignment of the fender's bottom edge contour with the rockerpanel's contour. I cut out the rotten area, happy to see there was only light surface rust on the corresponding inside of the outer panel as the rot formed from dirt between the fender and rockerpanel, not rot inside the fender channel as on the other side. I'll fabricate a patch to match the shape of the rotten piece photographed on the blue paper shop towel and weld it back in so that all the seams are hidden. I've also got to figure out a way to sandblast the surface rust on the fender flange, a problem because it's too big to put in the blasting cabinet and too wet to do it outside using my pressure pot blaster due to high humidity clogging issues.
![[IMAGE]](http://www.darrylsgarage.com/912/912RFNDB.jpg)
Entry: 12/14/06 - After a couple days spent preparing for Christmas and running off to retrieve my daughter, whose fall quarter is over at college, I finally got some time back on the car today. One thing I did have time to do over the last couple days was stop by and discuss details about painting the car with Nick Stack, the owner of Aldercrest Auto Rebuild. I've developed a great relationship with Nick, for doing my car project unibody straightening and paint work and he's a pleasure to work with. The "paint system" to be used is PPG's "2K" acrylic urethane which means I'll be using PPG K38 High Build Primer Surfacer once I've completed all the bodywork. Nick wants me to buy a gallon of the PPG Deltron (DAU) Bahama Yellow color coat paint so all the paint I'll be needing will be mixed at one time in one batch and stored in his paint room. This will allow me to paint the car in stages, first dropping off the main body without doors, bumper, hood or trunk lids for the main paint and "jab" work. Later I can drop off the other pieces and bring them home to mount on the car at my leisure. Since all the paint comes from one batch, it will match perfectly across all the pieces. Back at my shop, work on the front fenders has slowed a bit, waiting for a hand-held sand blasting gun I ordered to arrive. The hand-held sandblasting gun is bigger than my spot blaster but smaller than my pressure pot blaster and will work for smaller jobs I need to do outside during the wet season. I definitely want all traces of rust blasted away before welding in any patches. Today I went ahead and stripped all the silver zinc primer off the outside and the black Hammerite paint out of the headlight and turnsignal buckets on the left fender using carburetor cleaner. Since I'm going to be using a catalyzed urethane primer which will seal the metal, I figured it isn't worth the risk of the Hammerite "lifting" if the two are not compatible. Once again, talking with the pro has made me go back and re-do a small section but saved me tons of rework in the long run... all part of the education process. Tonight both fenders have a fresh coat of Eastwood Company's Metal Wash to insure no flash rust will form and the sit drying by the heat.
![[IMAGE]](http://www.darrylsgarage.com/912/912LFNDN.jpg)
Entry: 12/17/06 - On the evening of Thursday, December 14, the Seattle metropolitan area was hit with some of the highest winds ever recorded! As the "Evergreen State" most of the area is covered by a canopy of 100' cedar and fir trees, my home is no exception. The mixture of high winds and large trees has resulted in one of the widest reaching power outages ever experienced due to trees falling over and bringing the powerlines down with them. Somehow telephone and DSL service are still working (thank-you Lord!). Today marks day 3 of running the minimal household services (heat, light, refrigeration & computer) on a small 5000-watt gasoline powered generator with at least that many more ahead due to the slow rate of service returning by the overwhelmed repair crews. UPS, bless their brown hearts, is still making deliveries, so I have my nifty new spot sandblasting gun in my hands but no power to run my air compressor! Standing in a cold, dark shop with no compressed air, watching for the first signs of flash rust on bare metal fenders is not good for one's mental health...things are getting desperate!
![[IMAGE]](http://www.darrylsgarage.com/912/912nopwr.jpg)
Entry: 12/19/06 - 5 DAYS AND STILL NO POWER!!! Luckily I still have Internet access using my generator-powered computer so I've been busy scrounging parts. One of my good local Porsche buddies I met thru the 912bbs.org, Paul, is currently restoring a '68 "soft window" 912 Targa to such a high level of concours perfection that he's passing on used, 9.5 on a scale of 10 condition parts to me when he finds NOS (New Old Stock). Here's the latest items he's sold me, a near perfect pair of front turn signals. The only real visible flaw is slightly "yellowed" gray foam rubber seals. Stoddards sells the new gray seals for $18.05 each with my "preferred customer" discount so they should pass for dang near NOS when mounted! These '65-'68 one-piece turn signal units are listed as NLA (No Longer Available) from the Porsche dealer, so finding a pair in this shape for $175 each is really a screaming good deal, heck new OEM '69-'73 replacement front turnsignal lenses (yes, just the lenses!) cost that much at Stoddards! BIG THANKS Paul!
![[IMAGE]](http://www.darrylsgarage.com/912/912fsigs.jpg)
Also since my "shut-in" status, I scored these on eBay, $95 for a pair of re-chromed 4-screw grills... compared to $200 each (recently quoted by Queen City Plating in Mukilteo) to re-chrome a pair of brass "cores" I purchased for $60 off a guy from the Pelican Parts BBS, I saved $365 on the "worst case" cost I had budgeted for these pieces (check out my project "accounting" spreadsheet below)! Suffice to say, I left Queen City Plating, mouth agape and eyes glazed... holy cow, plating metal is outrageously expensive these days!
![[IMAGE]](http://www.darrylsgarage.com/912/912ebay1.jpg)
![[IMAGE]](http://www.darrylsgarage.com/912/912ebay2.jpg)
A couple days ago, I also scored these on eBay, a pair of authentic NOS Hella headlight units, Porsche part 901.631.101.31 for $350!
![[IMAGE]](http://www.darrylsgarage.com/912/912ebay3.jpg)
Considering Stoddards lists them at $124.66 each (with my discount), it might seem like I overpaid about $100 for the pair but they are listed as NLA now. Considering my only alternative was "backdating" a new pair of Bosch H4 units I found on eBay for $310 with a set of Hella clear lenses from Wolfsburg West for $108 using restored inner "gray" colored "guts" of the unit, I came in under my budgeted amount for the real deal, NOS no less! 12-volt sealed beam headlights for them are available at Stoddards for $4.40 each (again with my discount). So I guess this time spent shut-in with my generator powered PC and internet access hasn't been all bad for the 912 project, eh? Now if I could just find a nice set of all chrome (no rubber pad) front bumperettes, I placed a want-ad on the Pelican Parts BBS for a set, we'll see what turns up. Queen City Plating quoted me $245 each to re-chrome the set of front bumperettes I already have and I surely can find a pair in good shape for less than $500! I sure am looking forward to having power back on in the garage, hopefully in a day or so!
Entry: 12/20/06 - NOW IT'S BEEN 6 DAYS AND STILL NO POWER!!! But who cares... I got an excellent, almost immediate response on my "wanted" ad on the Pelican Parts BBS and purchased an awesome set of the correct early front bumperettes from David Hanning who owns earlyaircooled.com, a parts house that specializes in early 911 and 912 parts! Check these out, the right one is NOS (New Old Stock) and flawless, the left one is used and 9 on a scale of 10 quality. The pair for $215 shipped! ARE YOU KIDDING ME??? That's $30 less than having ONE re-chromed!!! The correct, both original, one NOS!!! I must be living right!!! Given the cost of the core set, I've just saved over $300 over my "worst case" estimate if I had to replate the used cores (check out my project "accounting" spreadsheet below)! I am tracking close to my total project budget of $20K to completely rebuild this car given this purchase completes all the cosmetic items required for the rebuild!
![[IMAGE]](http://www.darrylsgarage.com/912/912fbmp1.jpg)
Entry: 12/21/06 - DAY 7 OF THE BLACKOUT OF 2006... STILL NO POWER! The line crews continue to work right across the road and it looks like they're getting close. Meanwhile, I'm here looking for a good "inspirational" photo of an early 912 in all my Porsche books. Finally I found a great one in Excellence Was Expected by Karl Ludvigsen. As you can clearly see in the following photo, besides a few European vs. US Export turnsignal lense differences, 4-screw horn grills, all chrome bumperettes (no rubber impact strip), narrow "deco" strip inserts, right parking silver wiper arms, small Durant mirror on the driver's side only, 7 & 1 o'clock adjusting screw holes on the chrome headlight rings, Hirschmann "red tip" radio antenna and numerious other small details. As I look over my inventory of replacment parts, I'm not 100% correct (come on, $175 for a "red tip" Hirschmann antenna when a $20 Hirschmann "key" type will do) but the minor variations will only be detected by experts like PCA concours judge Al Caldwell, the original owner, I look forward to letting him "judge" his old car someday soon! I do know my hood will have a tighter side gap than that wide one in the photo... 3 mm on both sides on mine by gosh! A 912bbs.org buddy, Lorenzo from Tennessee and his brother stopped by to check out my 912 project by flashlight, great fun talking '66 specific details with a guy who owns an even earlier one than mine! Still no power at 5 PM... ARGGGH!
![[IMAGE]](http://www.darrylsgarage.com/912/912goal1.jpg)
Entry: 12/23/06 - POWER WAS RESTORED YESTERDAY AT 2 PM, THE BIG BLACKOUT OF AUGHT-SIX IS OVER!!! 8 Days without power, that's a new record! I lost count of the exact number of gallons of gasoline I poured into my 5000-watt Honda generator, 3 gallons at a time but a quick estimate 2 times a day times 8 days times 3 gallons equals 48 gallons of gas I poured into that generator!!!!!! Everything looks different when the garage lights work again... only damage was a couple fresh bullet holes in the garage refrigerator... I have no memory of how they got there! Christmas preparations and rain will be keeping me from any spot sandblasting but the first day the skys clear, I'm back in business! For now I think I'll just pamper that Honda generator with an oil change and sparkplug clean and re-gap... it certainly earned it, what a faithful piece of equipment it has turned out to be.
![[IMAGE]](http://www.darrylsgarage.com/912/shots.jpg)
Entry: 12/24/06 - Man, it sure is nice to have a heated and well-lit shop again! All my shopping is done, packages are wrapped and under the tree and the ingredients for my traditional "5-alarm" Christmas Eve chili are ready for cooking. So, I can go out in the garage and play for a few hours! A few months back, I purchased all new repro "deco" strips from Stoddards for the car, the total price was right at $240 and it seemed like the right thing to do. Well, as with most things reproduction, the new deco strips are cheap, third-world sweatshop handmade junk. No two ends are the same, let alone so crudely made, you can tell they're not original from yards away. Just look at how the original (on the bottom in the following photo) has a nice tight 'U' shape. The reproduction on the top is a lazy 'V' and even has grind marks that left flat spots after being polished out. I have to face it... the repro stuff is substandard and not going on my car!
![[IMAGE]](http://www.darrylsgarage.com/912/912repro.jpg)
So, I do have all the original anodized aluminum strips but they're a bit scuffed from where sandpaper slipped prepping for cheap re-paints and pocked from sand and road debris. Now I did a little research, and while I paid $240 for the repro deco strips, I can use all the black plastic center strips and backing seals which would have cost more to buy on the loose than as the set... so perhaps not all is lost! So polishing anodized aluminum is something I have lots of experience with, so why not get started in rehabilitating the originals! The first step is stripping off the anodized layer using Easy-Off oven cleaner. The process works a lot like using paint stripper, it takes time and patience to let the chemicals do their job but the lye in the oven cleaner definitely eats the anodized coating off leaving a hazy, gray coating. How can you tell the anodized coating is removed? Easy, use an Ohm meter because the anodized coating doesn't conduct electricity but the underlying aluminum does. Just keep applying the oven cleaner and periodically wipe an area clean and test to see it conducts electricity. When the needle on the Ohm meter pegs-out, you're done. Be patient though, it takes quite a while, I've let it sit for an hour between tests and re-wetting with oven cleaner. Definitely faster and easier than doing it by hand with 320-grit sandpaper, which is what I'll be using to remove any imperfections before using jeweler's rouge and a buffing wheel to get a shine back with!
![[IMAGE]](http://www.darrylsgarage.com/912/912deco1.jpg)
Entry: 12/28/06 - Finally, a clear day without rain and with power to my air compressor! I broke out the new "SPEED BLASTER" gravity-feed spot sandblasting gun and took aim at the surface rust and rot-thru spots on the right front fender. There were a couple spots where the rust had eaten all the way through and will be needing a patch welded in, so I needed to blast the surrounding area on both sides of the holes to determine how big of patches will be required. As you can see from the following photo, really pretty minimal patches, well below the edge of the fender that aligns with the trunk. Nothing anywhere near as extreme as the left side was. I blasted all of the rust away on the exposed, painted areas but some of the deeper pits on the lower flange were left and will just be dressed with the Dremel grinder, chemically treated and rust sealed since they won't be visible or exposed to constant moisture anymore.
![[IMAGE]](http://www.darrylsgarage.com/912/912RFNDD.jpg)
While I had the blaster out, I gave both fender's headlight buckets a good going over and they're pretty much ready for some minor filling and priming. My final task was blasting the area at the bottom of the fender bulkhead flange, cleaning the area to prepare it for welding a new patch in there. There are a few deep pits in the outer sheetmetal that will require filling with some MIG weld wire but nothing really major. I just need to fabricate the piece to replace the area I cut out on the inner flange area. Once blasting was done, I hosed down both fenders with scalding hot water and then sprayed a liberal bath in Eastwood Company's Metal Wash to control any flash rusting.
![[IMAGE]](http://www.darrylsgarage.com/912/912RFNDE.jpg)
Entry: 12/29/06 - Got out the tin-snips today and fashioned a small piece of 20-gauge sheet stock into what the rusted piece I cut out of the lower fender bulkhead flange used to look like. Here's a photograph of the new patch next to the original rotten piece:
![[IMAGE]](http://www.darrylsgarage.com/912/912RFNDF.jpg)
Fired-up the MIG welder and spot welded the patch into place. Since this patch is completely hidden, I did minimal dressing of the welds with my Dremel tool and called it good-to-go! As you can see in the following photo, the lower edge of the fender should mount nice and solid now and I'll be able to do the final tack welds to hold the outer fender sheetmetal contour even with the rocker panel contour once the fender is bolted to the car. Now just a few little patches to make on those other rot holes and I'm ready to mount these fenders on the car for good!
![[IMAGE]](http://www.darrylsgarage.com/912/912RFNDG.jpg)
Entry: 12/30/06 - Today I finished all the patching work on the right fender. Those two big rot spots on the fender flange I noted in an earlier journal entry were cut out and new sheetmetal patches fashioned to fill the void and welded in. All the other smaller pits and thin spots were filled with molten MIG welder wire and dressed flat with my 4˝" angle grinder and Dremel tool as you can see by the shiny sections along the fender flange in the following photo:
![[IMAGE]](http://www.darrylsgarage.com/912/912RFNDI.jpg)
Here's the close-up "after" photo of the two rot spots I displayed as "before" photos earlier this week. As you can see, the two large rot spots I patched today are now nice solid sheetmetal:
![[IMAGE]](http://www.darrylsgarage.com/912/912RFNDH.jpg)
Entry: 12/31/06 - Have you ever had one of those nights where you wake-up about 5 AM thinking you need to go to your computer and check the Craigslist for some reason? Well, I did last night and saw a new listing for a complete 1966 Porsche 912 engine, torn down, for $500 nearby. I made a mental note to call the phone number listed when I woke up. Well long story short, Here I am at 1 PM looking over the "treasure trove" spread across the floor of my garage! A '66 serial numbered case, the crank shaft spins freely by hand, the push rods have no lateral play, the heads look solid with clean intake and white chalky exhaust ports, two Solex carbs with the serial number tags still on them, set of '66 only Hummel & Mann cannister air filters, a spare starter, two fuel pumps, two oil coolers of which one looks new still in the wrapper, a fly wheel with solid dowel pin holes, all the heater boxes and cooling tins and the list goes on. Basically all I see missing is the generator/fan assembly and distributor... all had for $500! Since I'm planning on rebuilding my the original engine, it sure is nice to know I've got more options with spare parts should I have a cracked head or worn-out flywheel or crank. I'm sure having these parts on hand is going to pay big dividends and well worth the $500 investment! What a nice way to end 2006, the year spent restoring a 1966 Porsche 912! 2007 shows much promise of being the year I might actually drive it!
![[IMAGE]](http://www.darrylsgarage.com/912/912spare.jpg)
