![[IMAGE]](http://www.darrylsgarage.com/912/912dream.jpg)
![[IMAGE]](http://www.darrylsgarage.com/912/912-rust11.jpg)
Entry: 11/2/06 - Today's task was to "backdate" the right front fender from a '68 model to a '66 model. This involved removing the four mounting points spotwelded inside the headlight bucket for the "sugar scoop" style headlights by carefully grinding out the spotwelds. The next step was removing the mounting points for the "2 screw" style horn grill, by carefully cutting out the extra metal using a cut-off disc on my Dremel tool. The last step was welding in small metal tabs into the corners of the horn grill opening and mounting the proper "4-screw" horn grill by positioning the grill in the opening and drilling four correct size holes. Tonight the only task remaining on the "backdate" list is welding up the '68 only side marker light holes on the fender. The right side is now a mirror image of the real '66 fender on the left side. As you can see in the following photo, the headlight bucket is naked, the correct "4-screw" grill is mounted and there is a beautiful, uniform gap all the way up between the hood and fender as well as the bottom edge lining-up. Cleaning up the rust in the headlight bucket, turnsignal bucket and the horn grill opening will require simply stabilizing the rust, filling the holes with JB Magic Weld and sealing it in the same fashion as I did on the left side. Considering all the work that has been done to this corner of the car to correct the collision damage, I'd say that it's looking PERFECT-O!!!
![[IMAGE]](http://www.darrylsgarage.com/912/912RFND2.jpg)
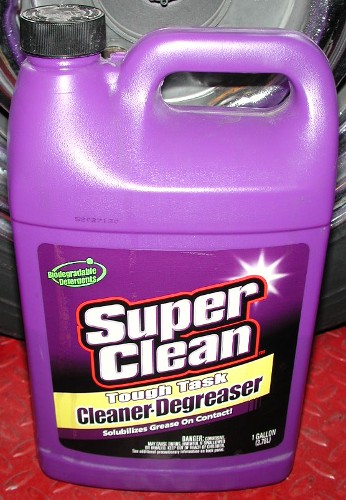
Entry: 12/9/06 - The first task for today was removing the two front fenders and rolling the car off the lift so I could clean and degrease the right front wheelwell with scalding hot water and my favorite purple "SuperClean" biodegradable degreaser. Cleaning went quite well, so now I'll perform my "faux factory undercoating" on the right nose where I repaired it last January and simply undercoated it with Wurth High-Build Underseal. Now that I've perfected my factory undercoating patch skills, I can go back and re-do that area with better results. I'll also touch-up the now clean factory undercoating at the rear of the wheelwell with a thick coat of fresh black undercoating after spot sandblasting away some surface rust at the top of the cowl just ahead of the fender mounting bulkhead.
![[IMAGE]](http://www.darrylsgarage.com/912/912RFND8.jpg)
Once I got the car back on the lift after cleaning the wheelwell, I stripped the paint on the replacement right front fender off the '68 donor car and the left A-pillar. Stripping paint is a test in patience, and after 5 coat + scrape + re-coat iterations, it was finally bare metal. I hosed the fender down with scalding hot water and then rinsed it with Eastwood Company's Metal Wash. All traces of the paint stripper used on the upper section of the A-piller was completely rinsed with carburetor cleaner, since I needed to remove the silver colored zinc weld-thru primer from the lower section with carburetor cleaner anyway. So tonight the right front fender sits drying and waiting for some spot sand blasting and rust repair. Good news is the fender looks to be quite solid and only surface rust so the welding required will be minimal. I think I'll get both front fenders prepped for paint and mounted before starting on the left rockerpanel/quarterpanel filler and block sanding, since it's dependent on fitting the door to fender gap.
![[IMAGE]](http://www.darrylsgarage.com/912/912RFND7.jpg)
Entry: 12/10/06 - Today's efforts were divided between the right front wheelwell and right front fender. The wheelwell needed some spot sandblasting attention paid to the cowl area just ahead of the fender mounting bulkhead, at the top where dirt had accumulated and retained moisture over the years. Luckily surface rust was all the damage done, no rot-thru, so after blasting, a coat of SEM Rust Seal to neutralize any remaining rust followed by A thick coat of black Eastwood's Rust Encapsulator to further seal the area. I then turned my attention to re-doing the undercoating in the collision repair area on the right front nose. A finger-tip "dabbed" coat of tan 3M seam sealing caulk created the desired random splatter pattern of the "faux factory undercoating" technique I've been perfecting over the last few months.
![[IMAGE]](http://www.darrylsgarage.com/912/912RFND9.jpg)
Once everything had dried thoroughly, I gave the entire wheelwell area a fresh coat of Wurth High-Build Underseal. The following photo shows how it looks all dried and with the masking removed. I cannot detect the seam between the original undercoating and the "faux factory undercoating" from any angle, so when I get the fender back on the car, it will really be difficult to see anything has been repaired!
![[IMAGE]](http://www.darrylsgarage.com/912/912RFNDA.jpg)
Between tasks on the wheelwell, I started spot blasting and rust prospecting on the right front fender. One thing I wanted to do while the fender was off the car was tack a small amount of steel on the very tip of the trailing edge where it meets the top of the door. The gap was not uniform and didn't meet the windshield column as it should since this used replacement fender had been fit to a different 912. I had drawn a pattern showing the rough size of steel that needed to be added. After making sure no lead solder was lurking there with my propane plumber's torch, I took a piece 3/32" steel oxy/acetylene type welding rod, formed and clamped it to the edge of the fender in preparation for welding it on. As you can see in the following photo, the welding rod clamped on and how it looked after welding and dressing with my Dremmel tool. I made it slightly larger than required so I can do final shaping to form a uniform 3mm door gap once the fender is bolted back on the car... can't miss any of these important factory original details.
![[IMAGE]](http://www.darrylsgarage.com/912/912RFNDC.jpg)
The only badly rotten spot on the replacement fender was at the very bottom of the fender mounting flange where it joins the bottom of the mounting bulkhead on the cowl of the car. This section is critical in maintaining alignment of the fender's bottom edge contour with the rockerpanel's contour. I cut out the rotten area, happy to see there was only light surface rust on the corresponding inside of the outer panel as the rot formed from dirt between the fender and rockerpanel, not rot inside the fender channel as on the other side. I'll fabricate a patch to match the shape of the rotten piece photographed on the blue paper shop towel and weld it back in so that all the seams are hidden. I've also got to figure out a way to sandblast the surface rust on the fender flange, a problem because it's too big to put in the blasting cabinet and too wet to do it outside using my pressure pot blaster due to high humidity clogging issues.
![[IMAGE]](http://www.darrylsgarage.com/912/912RFNDB.jpg)
Entry: 12/14/06 - After a couple days spent preparing for Christmas and running off to retrieve my daughter, whose fall quarter is over at college, I finally got some time back on the car today. One thing I did have time to do over the last couple days was stop by and discuss details about painting the car with Nick Stack, the owner of Aldercrest Auto Rebuild. I've developed a great relationship with Nick, for doing my car project unibody straightening and paint work and he's a pleasure to work with. The "paint system" to be used is PPG's "2K" acrylic urethane which means I'll be using PPG K38 High Build Primer Surfacer once I've completed all the bodywork. Nick wants me to buy a gallon of the PPG Deltron (DAU) Bahama Yellow color coat paint so all the paint I'll be needing will be mixed at one time in one batch and stored in his paint room. This will allow me to paint the car in stages, first dropping off the main body without doors, bumper, hood or trunk lids for the main paint and "jab" work. Later I can drop off the other pieces and bring them home to mount on the car at my leisure. Since all the paint comes from one batch, it will match perfectly across all the pieces. Back at my shop, work on the front fenders has slowed a bit, waiting for a hand-held sand blasting gun I ordered to arrive. The hand-held sandblasting gun is bigger than my spot blaster but smaller than my pressure pot blaster and will work for smaller jobs I need to do outside during the wet season. I definitely want all traces of rust blasted away before welding in any patches. Today I went ahead and stripped all the silver zinc primer off the outside and the black Hammerite paint out of the headlight and turnsignal buckets on the left fender using carburetor cleaner. Since I'm going to be using a catalyzed urethane primer which will seal the metal, I figured it isn't worth the risk of the Hammerite "lifting" if the two are not compatible. Once again, talking with the pro has made me go back and re-do a small section but saved me tons of rework in the long run... all part of the education process. Tonight both fenders have a fresh coat of Eastwood Company's Metal Wash to insure no flash rust will form and the sit drying by the heat.
![[IMAGE]](http://www.darrylsgarage.com/912/912LFNDN.jpg)
Entry: 12/28/06 - Finally, a clear day without rain and with power to my air compressor! I broke out the new "SPEED BLASTER" gravity-feed spot sandblasting gun and took aim at the surface rust and rot-thru spots on the right front fender. There were a couple spots where the rust had eaten all the way through and will be needing a patch welded in, so I needed to blast the surrounding area on both sides of the holes to determine how big of patches will be required. As you can see from the following photo, really pretty minimal patches, well below the edge of the fender that aligns with the trunk. Nothing anywhere near as extreme as the left side was. I blasted all of the rust away on the exposed, painted areas but some of the deeper pits on the lower flange were left and will just be dressed with the Dremel grinder, chemically treated and rust sealed since they won't be visible or exposed to constant moisture anymore.
![[IMAGE]](http://www.darrylsgarage.com/912/912RFNDD.jpg)
While I had the blaster out, I gave both fender's headlight buckets a good going over and they're pretty much ready for some minor filling and priming. My final task was blasting the area at the bottom of the fender bulkhead flange, cleaning the area to prepare it for welding a new patch in there. There are a few deep pits in the outer sheetmetal that will require filling with some MIG weld wire but nothing really major. I just need to fabricate the piece to replace the area I cut out on the inner flange area. Once blasting was done, I hosed down both fenders with scalding hot water and then sprayed a liberal bath in Eastwood Company's Metal Wash to control any flash rusting.
![[IMAGE]](http://www.darrylsgarage.com/912/912RFNDE.jpg)
Entry: 12/29/06 - Got out the tin-snips today and fashioned a small piece of 20-gauge sheet stock into what the rusted piece I cut out of the lower fender bulkhead flange used to look like. Here's a photograph of the new patch next to the original rotten piece:
![[IMAGE]](http://www.darrylsgarage.com/912/912RFNDF.jpg)
Fired-up the MIG welder and spot welded the patch into place. Since this patch is completely hidden, I did minimal dressing of the welds with my Dremel tool and called it good-to-go! As you can see in the following photo, the lower edge of the fender should mount nice and solid now and I'll be able to do the final tack welds to hold the outer fender sheetmetal contour even with the rocker panel contour once the fender is bolted to the car. Now just a few little patches to make on those other rot holes and I'm ready to mount these fenders on the car for good!
![[IMAGE]](http://www.darrylsgarage.com/912/912RFNDG.jpg)
Entry: 12/30/06 - Today I finished all the patching work on the right fender. Those two big rot spots on the fender flange I noted in an earlier journal entry were cut out and new sheetmetal patches fashioned to fill the void and welded in. All the other smaller pits and thin spots were filled with molten MIG welder wire and dressed flat with my 4˝" angle grinder and Dremel tool as you can see by the shiny sections along the fender flange in the following photo:
![[IMAGE]](http://www.darrylsgarage.com/912/912RFNDI.jpg)
Here's the close-up "after" photo of the two rot spots I displayed as "before" photos earlier this week. As you can see, the two large rot spots I patched today are now nice solid sheetmetal:
![[IMAGE]](http://www.darrylsgarage.com/912/912RFNDH.jpg)
