![[IMAGE]](http://www.darrylsgarage.com/912/912dream.jpg)
![[IMAGE]](http://www.darrylsgarage.com/912/912-rust8.jpg)
Entry: 9/16/06 - I've been laid-up a couple days because my wife and I were in a car wreck on September 12th! We were severely rear-ended in our 2001 VW Passat stationwagon (which was totaled) and both recovering from some whiplash. Today my neck is feeling better so I finally got back to the 912 project. I broke out the cutting tools and started tearing into the passenger side inner and outer rockerpanels! Knowing where things are located behind the sheetmetal made removing this side go much quicker. I left the area below and ahead of the A-pillar intact because it looks to be in better condition, like it might not need to be completely replaced like the driver's side was. The area below the rear torsion bar tube looks to be in exactly the same condition as the other side.
![[IMAGE]](http://www.darrylsgarage.com/912/912RRKR1.jpg)
I also cut out the remaining floorpans and the rust on the back end of the interior longitudinal panel is somewhat more rotted out than the other side but will only require a longer patch. The heater tube is in the same condition as the other side too. I am always amazed at the quantity of dirt and rust scales that falls out of the longitudinal channels when I open them up!
![[IMAGE]](http://www.darrylsgarage.com/912/912RRKR2.jpg)
Entry: 9/18/06 - The first task for today focused on stripping the old inner and outer rockerpanel spotweld flange where it meets the bottom of the door. A cross section photo of the donor clip where the rockerpanels were cut shows the spotweld locations:
![[IMAGE]](http://www.darrylsgarage.com/912/912cuts1.jpg)
Careful cutting with my 4Ẅ" grinder with a cut-off wheel where the 3 panels meet to form the weatherstrip channel releases the two outer spotweld flanges and allows me to pull them both out together in one strip. I will leave the top edge of the weatherstrip channel double thickness and trim this excess off the replacement outer rockerpanel when I weld the new sheetmetal back in (like I did on the other side).
![[IMAGE]](http://www.darrylsgarage.com/912/912RRKR3.jpg)
Once that task was completed it was time to strip the paint and undercoating off the A-pillar, fender joining panel and wheelwell sheetmetal to prospect for rust. To my delight, spot sandblasting (the little round grey circles in the photos) proved that there is really only surface rust on the upper surfaces. I had some pits blow thru with sandblasting which looked like holes caused by hitting road debris but I was able to weld them up and fill any thin areas around them with weld bead. The majority of the work will be in replacing the bottom 3" of the fender joining panel, for which I was able to cannibalize a healthy steel patch from the donor clip (sandblasted and sitting on the lift runner). A small patch along the pinch weld flange at the base of the wheelwell where it meets the floorpan will also be required but nothing as extreme as the driver's side required.
![[IMAGE]](http://www.darrylsgarage.com/912/912RRKR4.jpg)
There were also a couple deep rust pits that sandblasted through in the A-pillar base at the bottom corner of the door opening, but those were easily welded-up with the MIG welder and ground back to very close to the original contour and will require very little filler to finish. I was extremely pleased that I was able to patch and preserve the original spotweld lip for attaching the top edge of the rockerpanel and the lower A-pillar was still extremely solid, which will save many days of fabrication work. All my dire predictions that the passenger side had sustained more rust damage and would take more effort to repair than the other side have proven wrong. Rust is sure strange stuff to understand why one side would rust so much more than the other.
![[IMAGE]](http://www.darrylsgarage.com/912/912RRKR5.jpg)
Entry: 9/20/06 - The right inner longitudinal panel was the focus of today's efforts, cutting out and replacing all the rot in the rear section and filling the holes sandblasted thru on the bottom edge in the forward section. Cutting out all the rot required a slice that was 1Ẅ" wide by almost a foot long. Installing the patch was accomplished by first welding in the sheet of metal formed to match the curves of the vertical surface.
![[IMAGE]](http://www.darrylsgarage.com/912/912RRKR6.jpg)
Once the patch was securely welded in, I was able to trace the line where the floorpan flange needed to be and then bent the flange by cutting "pleats" into the curved sections at the bottom. As you can see in the following photo, MISSION ACCOMPLISHED, we're ready to weld a floorpan to that flange!
![[IMAGE]](http://www.darrylsgarage.com/912/912RRKR7.jpg)
Entry: 9/22/06 - We took our one and only daughter off to college yesterday so on my first day as an official "Empty Nester" it was time to attack the rust in the nose of the right longitudinal channel. Overall the sheetmetal was sound but prolonged moisture in the bottom of the channel had rusted all along the spotweld flange where the floorpan attaches and a 2" section up the interior longitudinal spot weld flange. As you can see in the following photo, there was significant rust-thru visible once the undercoating was removed with the use of my plumber's torch, scraper and wire brush.
![[IMAGE]](http://www.darrylsgarage.com/912/912RRKR8.jpg)
I cut away the bottom of the fender joining panel and repaired the deeply pitted sheetmetal behind its spotweld flange, grafting the healthy steel donor section back on will come next. All the rotten sections at the bottom of the outer rocker channel were cut out and sheetmetal patches fabricated to replace them. As you can see in the following photo, the welds were left somewhat rough since this whole section is covered in a thick splatter coating of Wurth undercoating and pretty much hidden. The important thing is all the rot is gone and there is a nice new spotweld flange to mate with the new floorpan sheetmetal.
![[IMAGE]](http://www.darrylsgarage.com/912/912RRKR9.jpg)
Entry: 9/24/06 - I'm starting to really enjoy working on the 912 on these Sundays, listening to the Seahawks rack-up yet another win on the radio while I weld and grind. Today's task was replacing the lower fender joining panel by patching what healthy metal was salvageable from the donor clip with a new spotweld flange I snipped out of another piece 18-gauge sheet stock. You can see the original that I cut out of the car on the top of the photo below, along with the donor section with the patch I fabricated below.
![[IMAGE]](http://www.darrylsgarage.com/912/912RRKRa.jpg)
A few hours of welding and grinding later and the fender joining panel is good-to-go and ready for a very thick splatter coat of Wurth high-build underseal over a hand-applied (fingertip dabbed) surface of 3M seam sealer. Next step will be removing the rear torsion bar plate and cutting away the sheetmetal to get at that rotted rear heater tube.
![[IMAGE]](http://www.darrylsgarage.com/912/912RRKRb.jpg)
![[IMAGE]](http://www.darrylsgarage.com/912/912RRKRc.jpg)
Entry: 9/25/06 - Not much time on the project today, I did a run to the bodyshop supply store and purchased more 3M seam sealer, which I hand-dabbed onto the rear wheelwell area to patch where I had to strip the factory undercoating to make the repairs. I also test-fit the front floor pan and marked the front edge with rattle-can primer so I can figure out where to cut out the remaining original floorpan and how I'm going to graft it into the new floorpan pressing. I am very happy with how the new pressing fits the replaced outer rockerpanel flange... PERFECT-O!
![[IMAGE]](http://www.darrylsgarage.com/912/912flor3.jpg)
Entry: 9/26/06 -I finished with the hand-textured undercoating "blend-in job" today and really like how well it turned out. I'll be cleaning up the rest of that wheelwell later and giving the entire surface a fresh coat of Wurth high-build undercoating. I'm getting better at creating a random splatter effect by going back over the area several times fingertip dabbing the 3M seam sealer. I don't think anybody would suspect the amount of fresh sheetmetal under that undercoating and zero rust or filler!
![[IMAGE]](http://www.darrylsgarage.com/912/912RRKRd.jpg)
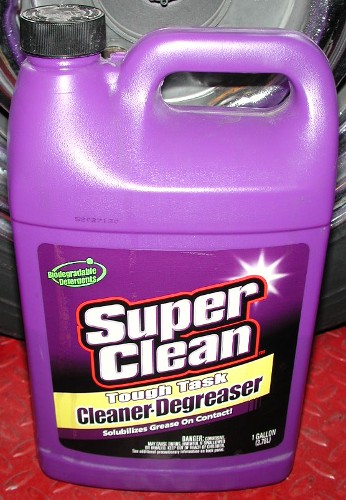
Entry: 9/27/06 - Today's task was cutting a little more of the door lock post, up to the recess for the latch and the rocker panel support out to begin the process of deciding how much new metal will need to be grafted in to fix the rot under the rear torsion bar tube. Removing the rear suspension components, including the banana arm, brakes, spring plate and torsion bar was the next step in getting at the rotten section. The last task for the day was getting out my favorite purple "SuperClean" biodegradable degreaser and scalding hot water and cleaning the underside of the right fender, the area above the transmission and axle and engine compartment. Tomorrow, I'll start stripping undercoating and prospecting for rust around that torsion bar tube. As it sits now, it looks like I'll be doing exactly the same amount of new sheetmetal grafting from the replacement pressing as was required on the other side, which is fairly straight forward.
![[IMAGE]](http://www.darrylsgarage.com/912/912RRKRe.jpg)
Entry: 9/28/06 - Today's task started with the plumber's torch, scraper and wire brush to remove that thick undercoating and see just how high the rot went in the area under the torsion bar tube. As you can see in the following photo, the rot is isolated in the lowest sections of the longitudinal channel, in fact it is a carbon copy of the driver's side.
![[IMAGE]](http://www.darrylsgarage.com/912/912RRKRf.jpg)
I tried to match the cuts I made to the driver's side as closely as possible, including the size of section removed from the heater tube. I will be using the lowest torsion bar cover retaining captive nut from the new pressing, just as I did on the other side, which will allow me to use the cover as a panel alignment tool. After cleaning-up all the cuts I took a wire brush to the insides of the longitudinal channel and gave it a liberal coating of SEM Rust Seal. I disassembled the rear suspension components and began the degreasing process, and will media blast them once they dry thoroughly. I am feeling very confident that I can replicate the quality of the repair made to the driver's side, probably in half the time with all I learned in the process.
![[IMAGE]](http://www.darrylsgarage.com/912/912RRKRg.jpg)
Entry: 10/2/06 - Today it was time to fabricate the replacement section of the heater tube using 2" flexible exhaust tubing. The turns within the longitudinal channel and under the torsion bar tube are too tight for the flexible tubing so I used my chop saw to make a series of cuts in the tube in order to make tighter bends. Once satisfied with the shape, I welded the cuts back up using my MIG welder. Tonight the replacement tube fits perfectly and is ready for welding into place.
![[IMAGE]](http://www.darrylsgarage.com/912/912RRKRh.jpg)
Next it was time to cut down the large replacement panel to size and fit it to cover the gaping area under the torsion bar tube left after the aggressive removal of all the rotten sheetmetal. As you can see, the patch is fitted and ready for welding in! I am amazed at how quickly the second time goes when I'm not having to ponder how I'm going to do the repair and just repeat the procedure learned on the other side. I'm thinking I'll be installing the new floorpans in once the longitudinal panel is finished on this side and then finish up with the rockerpanel.
![[IMAGE]](http://www.darrylsgarage.com/912/912RRKRi.jpg)
Entry: 10/3/06 - Before I can weld in the outer longitudinal patch panels, I've got to finish up a couple small tasks inside the channel. First of all was replacing the rotted-away outboard seat rail support rib. There is a small corrugated reinforcing rib welded under the seat rail that is designed to keep the seat from flexing the inner longitudinal panel sheetmetal under the occupant's weight or hard cornering. I cut off the old one and traced the corrugation pattern onto a paper pattern so I could bend a new one out of 20-gauge sheetmetal stock. Once bent, I cut it to match the profile of the floorpan and welded a 10 mm wide "foot" on it so it lays flat against the floorpan sheetmetal. I'll probably add a very thin strip of 3M strip caulk or seam sealer to the bottom of it when I put the floorpans in just to keep it from attracting moisture and rusting again.
![[IMAGE]](http://www.darrylsgarage.com/912/912RRKRj.jpg)
Once the seat rail reinforcing rib was welded in using the holes I punched in it for plug welds, my attention turned to welding in the new heater tube section. I welded some small tabs on to the old heater tube anchoring fixtures where the old welds were and tack welded the new tube onto the tabs and in several spots where the tubes mated.
![[IMAGE]](http://www.darrylsgarage.com/912/912RRKRl.jpg)
The last step was using "Muffler Patch" sealing paste to seal the mating point where the old tubes and new tube meet. I chose "Muffler Patch" because it would hold up to high temperatures without breaking down or smelling like something was melting. A thick coat of black Eastwood's Rust Encapsulator inside the channel and over the heater tube completed all the work that needs to be done inside the longitudinal. I media blasted and painted the rear suspension components to fill the last hours of work for the day. The next step is welding on the patch panels and closing that longitudinal panel!
![[IMAGE]](http://www.darrylsgarage.com/912/912RRKRk.jpg)
Entry: 10/4/06 - Today it was time to close up the right longitudinal, starting the welding with the patch panel under the rear torsion bar and ending with the inner rocker panel pressing. A little final fitting and a couple hundred spot weld puddles later and it's all together, solid as a rock. I'm always amazed at how ugly my welds look because they're spot welded puddles and not a continuous bead. I'm always pleased with the penetration of each weld and after grinding to dress them, they'll look perfect.
![[IMAGE]](http://www.darrylsgarage.com/912/912flor6.jpg)
Entry: 10/6/06 - Today the dirty job of grinding down my ugly longitudinal panel welds into beautiful flush ones was the task looming in front of me. It took about a solid hour of grinding, first with my 4Ẅ" grinder and finishing with my Dremel tool in the tight spots. As you can see in the following picture, the welds are ground flush and any high spots have been hammered down flush to create a smooth seam line.
![[IMAGE]](http://www.darrylsgarage.com/912/912RRKRn.jpg)
Trimming the excess upper weather strip lip off the replacement outer rocker panel pressing was required to test fit it and the longitudinal support (the cone shaped thing just behind the lockpost). The test fitting went quite well and it looks like things are going to go smoothly when I get to that point in the restoration.
![[IMAGE]](http://www.darrylsgarage.com/912/912RRKRp.jpg)
I want to put the freshly media blasted and repainted rear torsion bar and spring plate back in next so I had to patch the undercoating I removed above the welds for the new sheetmetal. First by hand "dabbing" 3M Ultrapro Autobody Sealant to emulate the random splatter pattern of the original factory undercoating... a slow and tedious task, making sure not to get too close to the bottom pinchweld flange that still needs to be welded.
![[IMAGE]](http://www.darrylsgarage.com/912/912RRKRm.jpg)
Once the 3M seam sealer had dried, it was time to give it a couple thick coats of Wurth high-build underseal, blending in with the original factory undercoating. It seems like my skills at this undercoating blending get better with each time I get to practice the craft. With the quarter panel welded back on and the wheel and tire mounted, I do believe it will be impossible to detect a patch has been made! There is no body filler so there's no magnet detectable evidence of repair.
![[IMAGE]](http://www.darrylsgarage.com/912/912RRKRo.jpg)
Entry: 10/11/06 - Another new Porsche friend, James S. stopped-by today to have me take a look at his beautiful '81 911SC coupe and get my recommendations on some problem areas. It really reminded me of my first 911, an '81 911SC targa and that whole wide rear tire, flared rear fender, whale-tail phase I went through about 10 years ago, funny but now I'm into the older narrow bodies. Today's project was attaching the right jack plate and tube. The pressing for this piece from Restoration Design is not quite the same shape as the original one. With some flattening in my shop press and reworking of the bend at the bottom with a couple cuts and hammering, I was able to replicate the look and fit of the original. After welding the jack tube into position on the inner rockerpanel and anchoring it with a weld to the interior longitudinal panel, I punched plug-weld holes around the perimeter of the jack plate and welded it into place. A weld bead around the sides and bottom of the tube to attach it to the jack plate, dressing the welds that show once the outer rocker panel is installed and some 3M Weld-Thru Primer and I was done. Now I can start fitting the rear floorpan pressing next.
![[IMAGE]](http://www.darrylsgarage.com/912/912jack1.jpg)
![[IMAGE]](http://www.darrylsgarage.com/912/912RRKRs.jpg)
Entry: 11/3/06 - After pondering my approach, I decided that installing the outer rocker panel is the best way to proceed. The first step to that goal is positioning and welding in the longitudinal support brace that sits just behind the lockpost. I used a couple #6 sheetmetal screws to position the support brace, based on measurements from the other side. Welding it in went quickly and after punching some plug-weld holes in it, prepping the weld joint by cleaning it to bare metal and giving both surfaces a quick shot of zinc weld-thru primer. As you can see in the following picture, the plug-welds look good and solid. I also patched a damaged section of the weatherstrip lip in the rear corner area of the door opening.
![[IMAGE]](http://www.darrylsgarage.com/912/912RRKRv.jpg)
I did minimal dressing of the plug-welds visible from the wheelwell and began the application of the "faux factory undercoating" treatment over the whole area with 3M Ultrapro Autobody Sealant before moving on to final fitting the outer rockerpanel pressing. The pressing mates perfectly with the longitudinal support and the fender attachment bulkhead so, a couple #6 sheetmetal screws and some minor adjustments with my blunt-tipped air hammer tool and it's in place.
![[IMAGE]](http://www.darrylsgarage.com/912/912RRKRw.jpg)
