![[IMAGE]](http://www.darrylsgarage.com/356/356logo.jpg)
Darryl's 1964 Porsche 356C Restoration Project Journal
![[IMAGE]](http://www.darrylsgarage.com/356/356C.jpg)
Last Updated on September 30, 2011
PROJECT JOURNAL ENTRIES STARTING FROM PURCHASE (IN CHRONOLOGICAL ORDER)
Entry: 6/15/07 - A wise man once told me, "Opperknockity tunes but once" and I've tried to live by those virtuous words throughout my life. Well about 4 months ago I stopped by the shop of my 911 mechanic, John Walker (of John Walker's Workshop fame). John had this amazing "barn find" 1964 Porsche 356C coupe he found in the Portland, Oregon area. This car had blown an engine and been disassembled and stored away in 1977 only to return to the light of day 30 years later when John bought it and hauled it up here to Seattle. John had completely rebuilt the brake and fuel systems which were ruined from the years of water build-up in them and assembled a new engine using a close serial number 356C engine as the basis for adding a big bore kit, slightly "hotter" cam, single-shaft Solex 40 PII-4 carbs instead of the Zenith carbs that were on the car originally and a sport muffler. Now it's a screamer, fully road-worthy, still the original silver paint over rust-free sheetmetal! When I stopped by his shop last Monday, the day after the Denny Akers "356 Bull Session" car show from which I was still salivating over all the 356 Porsches, I noticed John had a brand new Harley-Davidson motorcycle sitting there. I asked if he had made it to Denny's and he said no and had been hoping to go and see if anybody was interested in buying his "barn find" 356C. I just about had a seizure when I heard he was considering selling this awesome car and I told him I was extremely interested and could have the cash to him within 3 hours of agreeing on a price. Some e-mail flew back and forth last evening and by 11 AM this morning it was like a scene out of the "Sopranos" mobster TV show, I was standing in John's shop with an unmarked envelope full of $100 bills fresh from my bank! I drove the car home, grinning like I did the first time I drove my first VW Bug by myself! This old 356C runs like a scalded cat and I am so stoked about finally having one of these fine old cars that I still can't believe it! I had to raise the 912 to park the 356 under it temporarily in the workshop until I free up some space in my storage garage. Since I will be taking the 912 into the painter soon, I'll have the room to lift the 356 to get a better look under it. By the way, those are "deep six" Fuchs wheels that John put on the car to give it that "outlaw" look and they will be coming off and going on my 911 sometime soon. Those are brand-new Bridgestone Potenza S-03 tires on those Fuchs as well, how cool is that!
![[IMAGE]](http://www.darrylsgarage.com/356/356home3.jpg)
I drove back down to John's shop in the afternoon with the Honda CR-V to haul all the boxes of parts that had been removed, new rubber weatherstripping, spare steel wheels, dash pad and the original bumpers back home. John threw in some new deco strips for the bumpers.
![[IMAGE]](http://www.darrylsgarage.com/356/356home1.jpg)
The car is amazing, the odometer shows just over 83,000 miles which sounds right for a car that had only 10 years use before blowing the engine. The original paint is silver and the interior is a classic Porsche orange/red "lobster" color which has been dyed black. I have always wanted a silver 356 with a "lobster" interior and this is what the factory cardex will certainly confirm as original... yes, I'll spring the $100 for the "birth certificate" on this car! The Oregon license plates confirm the last tab was indeed from 1976. To give you an idea of how long this car has sat in storage, I was still a virgin in 1976 to which you're probably saying, "Hey, thanks for sharing, Darryl!!!"
![[IMAGE]](http://www.darrylsgarage.com/356/356home2.jpg)
John did an awesome job on rebuilding the engine, new powdercoated engine tins in the correct shade of gray for the 356C. I've also got the canister air filters, freshly powdercoated, for the Zenith 32 NDIX carbs, should I ever wish to retrofit them. For right now I'm just thrilled to have a running Porsche 1600cc 4-cylinder engine to understand and master before rebuilding the one on my '66 912. I plan on driving this 356C a lot while I'm finishing up the 912 project so no worries about delaying completion of the 912. It's just good to have my next project already in the chute and start watching for parts and such, being able to drive it is bonus points!
![[IMAGE]](http://www.darrylsgarage.com/356/356home4.jpg)
Entry: 6/18/07 - Rainy weather continues to delay taking the 912 to the paint shop, no big deal since I'm done with my part of the paint prep and ready for a little break from sanding. I spent most of Father's Day playing with my new 356 project, the first task was making room for all the parts in the boxes that came with the car. I sorted through all the boxes and put them on their own shelves in my "warehouse" for longterm storage. The next task was removing those beautiful "deep six" Fuchs wheels and installing the beautiful set of 5�" wide chrome wheels that will eventually be going on the 912. I will be going with 4�" wide wheels on the 356 which will take some hunting to find some with an appropriate manufacture date stamped on them, figuring out what that date should be based on my serial number is the first step in that little project. The last task for the day was hunting down any exposed rust and giving it a coat of SEM Rust Seal as a "first aid" dressing until the day I can media blast and properly fix the areas. I was very please with the lack of serious rust anywhere on the car on the top side but I'll have to wait to see what lurks on the underside until I have the 912 off the lift. I've got the battery on the charger and will move the 356 into my "showroom" for storage once I've got it fully charged. The "GEN" light comes on when the car is idling and John Walker threw in a spare 6-volt voltage regulator with the car as a fix to that problem so it will be the first thing I solve. There is also a pretty good oil leak with the newly rebuilt engine that looks to be coming from the flywheel area so it might require pulling the engine to fix.
![[IMAGE]](http://www.darrylsgarage.com/356/356chg1.jpg)
I am totally in love with this car already and can picture a fresh coat of the classic German racing color, a non-metallic silver paint with a fresh new "lobster" red leather interior, exactly like the one below. Now picture a beautiful woman sitting in the passenger seat with her blond hair in a scarf with hazel green eyes looking over a pair of cat-eye Polaroids and a picnic basket behind the seat and I'm there...
![[IMAGE]](http://www.darrylsgarage.com/356/356goal1.jpg)
Entry: 6/25/07 - I scored a good rebuildable set of Zenith 32 NDIX carburetors on eBay today for $250, the correct ones for a '64 356C (as shown in the owner's manual).
![[IMAGE]](http://www.darrylsgarage.com/356/zenith6.jpg)
The correct canister air filters, freshly powdercoated, and the correct small throat intake manifolds came with the car so I just need to order the rebuild kits and get busy. This is an area where my friend Jack Morris can help me rebuild them and correctly jet them for my specific engine cam and big-bore set-up. I'm always cruising eBay for those bits and pieces I need for my projects and it's always gratifying to find exactly what I need at a fair "buy it now" price so I don't have to get involved in a highest-bidder auction.
![[IMAGE]](http://www.darrylsgarage.com/356/zenith1.jpg)
![[IMAGE]](http://www.darrylsgarage.com/356/zenith5.jpg)
Entry: 6/24/07 - I took the 356 out for a drive today with the new wheels and thought a few more pictures for the website were in order. The car is now parked in the "showroom" and will remain there until I finish the 912 project. I'm currently thinking that I'll pull the engine from the 356 to fix the oil leak, swap to a 12-volt flywheel and install it into the 912 so I can get it on the road sooner. I'd like to get the new brakes and fuel system debugged, the wheels aligned and assess the condition of the transmission on the 912 before starting on the engine rebuild. It all works nicely since the 356 will begin the tear-down phase about the same time I'm doing the engine rebuild on the 912 so the 356 engine won't have to sit unused for long.
![[IMAGE]](http://www.darrylsgarage.com/356/356home5.jpg)
![[IMAGE]](http://www.darrylsgarage.com/356/356home6.jpg)
![[IMAGE]](http://www.darrylsgarage.com/356/356home7.jpg)
![[IMAGE]](http://www.darrylsgarage.com/356/356home8.jpg)
Entry: 7/12/07 - I've moved the 356 onto the 4 post lift and taken a good look at the underside of the car. Other than a fairly large hole under the battery and a somewhat mangled rockerpanel on the left side, the car is totally solid. There was a fairly large dent in the lower left front fender that looked like the perfect place to try a new tool I bought for my air hammer to pound out dents. The secret to using an air hammer to do this type of work is to adjust the air flow to the tool so that when it's wide open with no back pressure it makes the air hammer putt like an idling motor. That way you can pause between "burps" to allow the air hammer to build the pressure you desire, fine tuning it on the fly as you use it.
![[IMAGE]](http://www.darrylsgarage.com/356/356lfnd1.jpg)
So here's the dent before any air hammer work:
![[IMAGE]](http://www.darrylsgarage.com/356/356lfnd2.jpg)
And here's how it looked after the first pass using the air hammer. I could tell that there was a skim-coat of BONDO under the paint because of the cracks and pink substrata. At this point it's time to stop and strip the surface to bare metal since if there's BONDO, I can't read how flat the real metal surface hidden under the filler is.
![[IMAGE]](http://www.darrylsgarage.com/356/356lfnd3.jpg)
Some quick work with my standard "aircraft style" paint stripper, scraper and steel bristle brush and the bare metal surface was quickly exposed. I used my pneumatic random-orbital sander with 150-grit paper to blend the edge of the paint and expose high spots on the metal. Now I can see all the existing hammer marks when I proceed to the next step of hammer and dolly work. There's also some surface rust that will be getting the spot sandblaster treatment as well. I'm very happy with the general health of the underlying steel but realize that we're talking a complete media blast of the entire body, undoing all the prior bodywork before any new paint can be layed on this car.
![[IMAGE]](http://www.darrylsgarage.com/356/356lfnd4.jpg)
Entry: 9/6/07 - The 356 developed a pretty severe oil leak from the front (flywheel) side of the engine so I needed to pull it to replace the flywheel seal. There also seemed to be a bit more blue smoke than I feel should be coming from a newly rebuilt engine so that needs to be resolved too. John Walker mentioned that he reused the pistons and cylinders and simply installed new rings so I figure that's probably where the problem lies. I recently picked-up a new set of AA-Products 86MM 1775CC big bore piston and cylinders (a.k.a. Chinese-made big-bore repros) on clearance for $399 from California Import Parts (cip1.com) with the intention of installing them on this engine and seeing how they worked since they're such a bargain. In addition, I'm planning on rebuilding and installing the used Zenith 32 NDIX carburetors on this engine as well to return it to the original "C" configuration (it's currently at the "SC" configuration running the Solexes). I'm also planning on having some of the powdercoating redone on the oil canister and valve covers in the correct factory silver color just because I'm a bit anal about those types of things. Dropping the engine went pretty quickly, I removed the Solexes before dropping it just to make it easier.
![[IMAGE]](http://www.darrylsgarage.com/356/356eng1.jpg)
I rolled the engine over to the shop using a piano dolly. I purchased a 38" long piece of 2" x 2" square steel tubing (1/8" wall thickness) to modify my standard V8 engine stand to handle the wider, more unstable Porsche engine. I slid the Porsche engine off the piano dolly and onto the 4-post lift to bring it up high enough to bolt it to the engine stand.
![[IMAGE]](http://www.darrylsgarage.com/356/356eng2.jpg)
Here's a close-up of the generic engine stand adapter ring (the gray half circle ring) that converts the V8 style plate to the Porsche/VW engine. This stand will now handle any air-cooled VW or Porsche engine, including a flat-6 911 engine!
![[IMAGE]](http://www.darrylsgarage.com/356/356eng3.jpg)
I installed the "tear-down table" I made out of 16-gauge sheet steel screwed to a sheet of 3/4" plywood cut to fit the 4-post lift as a temporary workbench. I have the engine disassembled down to the point I'm ready to transport it to Wolfsburg Motorwerks (where I've been working 2 days a week as my part-time hobby job now that my wife has passed away and I have all this idle time) and I'll have my boss, Jack Morris, train me with the installation of the new cylinders, calculating the compression ratio and shimming the heads to the desired thickness. Working for a professional shop gets me my parts at wholesale and I get to use all the the professional tools... A SWEET GIG!
![[IMAGE]](http://www.darrylsgarage.com/356/356eng4.jpg)
Another little "side project" currently going on is the conversion of the wheels, back to 4�" painted factory steel wheels as was found on the "C" model of this car. I've slowly acquired 4 good 4�" wheels dated 8/65, 10/66, 12/66 and 1/67 and already straightened, media blasted and painted one of them. I used Eastwood Company's Argent Silver Wheel Paint on the front side and Duplicolor New Ford Gray high temperature engine paint on the inside of the rims and the backside. I'm planning on mounting a cheap set of Nanking 165 SR 15 steel belted radials on them, sold through Les Schwab for $60 each.
![[IMAGE]](http://www.darrylsgarage.com/356/356whl1.jpg)
Entry: 9/10/07 - Today I gave the set of used Zenith 32 NDIX carbs I purchased on eBay some much needed attention. While I was at work at Wolfsburg Motorwerks, I dropped the carbs and intake manifolds in the hot tank at the shop, they came out looking quite new looking. I noticed a couple things, first is that I'll need to find a set of the larger "Super / C" type venturi rings because my carbs have the smaller units for earlier engines (that might be a challenge). The other thing is that all the screw slots look unmolested and the plating on the throttle levers still looks great. Here's a nice before and after shot to show how nicely they cleaned-up. I also hot-tanked and bead-blasted a set of valve covers, an oil filter canister and correct 356-style oil breather tank (the one on the engine was from a 912) to prep them for the powdercoater the shop uses to get them redone in the correct colors. Once ready, I tossed them into the big shipment of engine tins awaiting pick-up by the powdercoater and will be watching for their return in a week or two.
![[IMAGE]](http://www.darrylsgarage.com/356/356carb1.jpg)
The ports where the intake manifolds meet the heads will need to be enlarged slightly to match the ports on the "Super / C" type heads. A local machine shop will be able to handle this task for me. As you can see in the following photo, the manifold gasket that mated the old Solex carbs to the engine is about 2 mm larger and that excess aluminum will need to be removed from the intake manifolds, the throat gradually flared like a funnel and the interior polished. Ah, the joy of building a big-bore engine but keeping it looking totally stock!
![[IMAGE]](http://www.darrylsgarage.com/356/356carb2.jpg)
Entry: 9/11/07 - Since these Zenith carbs had been exposed to water yesterday, I wanted to get them apart and all the moisture displaced by spraying the internal areas with penetrating fluid. I also wanted to get the smaller "32 - 24" marked venturi rings out of the throats which required successful removal of the injection tubes that squirt raw fuel down the center of the throats. Liberal use of penetrating fluid and careful tapping with a block of wood and a hammer removed the injection tubes and opened the way for the venturi rings. I found a socket (wrench) that fit the throat of the carburetors perfectly and pressed out the venturi rings, through the top, using my shop press. Having the venturi rings out on the loose insures that I can put new ones in these carbs and if the larger "Super / C" ones cannot be found, perhaps a machine shop can enlarge the 24mm opening to the size of the "Super / C" version. I'm very happy with the condition of the interior of these carbs and can't see any reason they won't work perfectly when I get done.
![[IMAGE]](http://www.darrylsgarage.com/356/356carb3.jpg)
I also completed media blasting and painting of the second 4�" steel wheel, so that project is halfway done!
![[IMAGE]](http://www.darrylsgarage.com/356/356whl2.jpg)
Entry: 9/15/07 - Luckily I was able to source the larger 28 mm opening "Super / C" venturi rings through 356 Carburetor Rescue of Sedona, Arizona, and they should be arriving shortly. I've also researched the proper jet sizes and will be needing to find the correct ones for the air correction jets and pump jets which are smaller than the ones used in these "Normal" carburetors, all the other jets are the same or larger and can be reamed into the new sizes. I've finished preparing the right carburetor for assembly after soaking it in NAPA carburetor cleaner for two days and then scrubbing the surface with a toothbrush and my favorite product, ABC Corrosion Buster which uses a strong concentration of phosphoric acid to eat away the stains and corrosion deposits. I've also acquired the carburetor rebuild kits that includes the accelerator pump piston. The intake manifolds will be going into the machine shop on Monday.
![[IMAGE]](http://www.darrylsgarage.com/356/356carb4.jpg)
I also completed media blasting and painting of the third 4�" steel wheel, so that project is entering the 4th Quarter!
![[IMAGE]](http://www.darrylsgarage.com/356/356whl3.jpg)
Entry: 9/18/07 - Today I finished the fourth 4�" steel wheel, with plenty of paint left in one can of Eastwood Company's Argent Silver Wheel Paint I used on the wheels to do a spare tire when that time comes. I have lots of Duplicolor New Ford Gray high temperature engine enamel in the single can I used for the inside of the wheels so one can of each, plus a can of primer is more than enough paint for the job and the total cost was about $20! I'll let the paint cure and harden for a few weeks before mounting new tires.
![[IMAGE]](http://www.darrylsgarage.com/356/356whl4.jpg)
Entry: 9/19/07 - I've finished preparing the left carburetor for assembly after soaking it in NAPA carburetor cleaner for two days and then scrubbing the surface with a toothbrush and my favorite product, ABC Corrosion Buster which uses a strong concentration of phosphoric acid to eat away the stains and corrosion deposits. Now both carburetors are ready for assembly and just waiting for the 28 mm "Super / C" venturi rings to arrive.
![[IMAGE]](http://www.darrylsgarage.com/356/356carb5.jpg)
Entry: 9/24/07 - The 24 mm "Super / C" venturi rings arrived today from 356 Carburetor Rescue so I can begin the assembly of the Zenith carburetors anytime. All the jets are accessible with the carburetors assembled so all the dependancies keeping me from proceeding have been resolved. A side-by-side showing the "Normal" 28 mm venturi tubes next to the "Super / C" 24 mm venturi tubes clearly illustrates the method used by the engineers to get more air through the carburetors and feed the more open heads and larger displacement 1720 big-bore engine. I can't wait to get this all reassembled and see what kind of horsepower the more bullet-proof (and correct for my "C") Zenith carburetors can produce as compared to the Solexes that came on the car!
![[IMAGE]](http://www.darrylsgarage.com/356/356carb6.jpg)
Entry: 9/29/07 - I'm starting to reap the benefits of getting my parts at wholesale through my part-time job at a repair shop that specializes in 356 cars! Converting my 356C back to Zenith carburetors changes the fuel line that runs from the fuel pump to the dual carbs. I could approach this one of two ways, hack together a Solex set-up to work with the Zeniths or buy the genuine Porsche part that's correct for the original Zenith carburetor set-up. As you can see in the following photo, I chose to do this right and you wouldn't believe how much these things are marked-up when you buy them at retail price through a Porsche dealer, I saved about half! The bad news is the discovery that the original part has a "banjo" type (hollow) bolt at the fuel pump connection instead of a slide-on clamp fitting like those found on 912 fuel pump (like the one on my engine). Using the correct fuel line is going to require finding the correct earlier style fuel pump and special "banjo" bolt. Not such a daunting task when you work at a place with a huge inventory of used 356 parts so I'll have to see if Jack, my boss can help me out here.
![[IMAGE]](http://www.darrylsgarage.com/356/356carb7.jpg)
Luckily I've just found the missing dealer parts catalogs to complete the set for my car. The 356C parts catalog is comprised of one main and two supplemental books. The 356B parts book (top one in the following photograph), the 356B supplemental parts books (middle) and the 356C supplement to the 356B books on the bottom. I can now reference the manuals and see photos of the parts I am missing and be able to refer to them by the correct part number when I'm contacting vendors.
![[IMAGE]](http://www.darrylsgarage.com/356/356book1.jpg)
Now these old manuals are pretty well worn and not the prettiest to look at on the outside, but the insides are complete and contain all the dealer updates so they're worth their weight in gold for the information they contain. The shop I work at has the 356B/C workshop manual so I'm able to borrow it and photocopy the sections I need to refer to for my repairs. I'd like to get my own copy at some future date but I can wait for a good deal to come along now that I can borrow a copy.
![[IMAGE]](http://www.darrylsgarage.com/356/356book2.jpg)
Entry: 10/6/07 - The intake manifolds came back from the machine shop and they've been enlarged (ported and polished) to match the larger intake ports on the 912 heads. I got about a 50% discount on the machine shop costs by going through "the shop" for the work, how sweet is that! Now I am on a quest for "C" spec jets for my Zenith carburetors. Now that I've dived into this whole "Normal" to "C" spec conversion on my Zeniths, I realize finding a set of the correct carbs would be the cheapest way to do this conversion and I would be willing to pay a premium price if I could find them. With a quick glance into the throats of the carbs, a trained-eye could quickly see the thinner venturi rings and "210" marked on the big air correction jets... oh, right, not easy to do when buying over eBay! I've also researched the OEM Porsche fuel line I purchased last week and realize that it's actually for a 356 "B" not a "C" like mine. I'll have to cut off the "banjo" fitting at the fuel pump end and install an in-line fuel filter in the gap that will be made up with hose there. According to Harry "The Maestro" Pellow, fuel filters should be installed on the pressure side of the fuel pump to prevent "cavitation" from happening to the pump if the filter gets clogged, so it is the right place to put my filter. All I know is that it will be a shame to cut this beautiful 356 "B" fuel line but that's the only alternative I have at this point, since there are no other new Zenith NDIX type fuel lines available from any other suppliers. On the wheel restoration subtask, I just ordered a set of 4 Dutch-made Vredestein 165R15 radial tires from Universal Vintage Tires, Inc. to mount on my newly restored 4�" steel wheels instead of buying the Chinese-made Nanking brand tires through Les Schaub. I just couldn't warm-up to the idea of Chinese tires on a German car! You can see the nice big and shiney ports in the intake manifolds and how they line-up with the 912 head intake gaskets in the following photo ... SWEET!
![[IMAGE]](http://www.darrylsgarage.com/356/356carb8.jpg)
Entry: 10/11/07 - Candace and Jim at 356 Carburetor Rescue came through for me again with the set of '210' sized air correction jets and '40' sized pump jets for my Zenith 32 NDIX "Normal to "C" spec carburetor conversion! Now all I am waiting for is the powdercoating to return and everything is ready for installing the new big bore pistons and cylinders with the Zenith carbs! Jack (my boss) is a new dad as of last Friday so I've been working full-time this week, running the shop for him while he's on a short paternity leave, leaving no time for working on my personal projects. It is strange to be the "face man" of the business and being the "fire wall" between the customers and the mechanics. I'm quickly becoming quite conversant in the mechanical issues surrounding the Volkswagen Vanagon, the bread-and-butter of the business but have a couple 356C projects fresh back from the painters that I'm responsible for ordering all the rubber and trim parts for. I'm always amazed at how many details get overlooked by owners who manage their own projects and let details like new door hinge pins go until after the car is painted, then expect us to install them without messing-up the paint... GRRRR! Anyway, I'm happy to have my correct sized carburetor jets for my Zeniths because it means it's only a matter of days until I'm driving that 356C again!
![[IMAGE]](http://www.darrylsgarage.com/356/356carb9.jpg)
Entry: 10/12/07 - Today the "birth certificate" for my 356C arrived from Porsche. This is a service of the company, where for $110, they will pull the original build spec, called a "cardex" from the factory archives and print them on a special "Certificate of Authenticity" for you.
![[IMAGE]](http://www.darrylsgarage.com/356/356cert1.jpg)
As you can see from the following close-up photo, details such as engine and transmission serial numbers, paint and interior colors, options like tires, wheels and radio are kept on the factory cardex. For a 100-point concours restoration, all these facts would have to match the car perfectly. Since my car doesn't have the original engine, its value is somewhat diminished, or as I like to think about it, offset by the dollars it would cost to make the car 100% perfect. As you can see, silver with a red interior is what matters most to me, I love that color combination and to have my car coming like that from the factory is a real bonus!
![[IMAGE]](http://www.darrylsgarage.com/356/356cert2.jpg)
Entry: 10/14/07 - I'm almost done with assembling the Zenith 32 NDIX carbs with the correct venturi rings and jets to convert it from a "Normal" spec to a "C" spec. I've got the main jets reamed out from "115" to "130" using my wire jet gauges and reamer tool. Now I just need to enlarge the idle jets from "50" to "55" and the idle air jets from "120" to "140" before I can complete the assembly process and begin testing and making adjustments. The tools and main jets are shown in the following photo, I use a belt sander to sand the "115" stamps off the end of the main jets so there is no question that measurement with a jet gauge is required by the next guy rebuilding these carbs.
![[IMAGE]](http://www.darrylsgarage.com/356/356carbb.jpg)
Looking into the throat of the carburetor shows what a fellow searching for the correct carbs at a swapmeet should look for, the thinner 28 mm venturi rings and "210" air correction jets are clearly visible in the following photo.
![[IMAGE]](http://www.darrylsgarage.com/356/356carba.jpg)
Entry: 10/16/07 - My new Vredestein 165/15 tires arrived yesterday so today it was time to have them mounted and balanced on the restored 4�" steel wheels! The tire shop I use has a machine that doesn't come in contact with the rim so there was no damage to the paint when the tires were mounted. I think they turned-out looking exactly like the originals and will look fantastic on the car!
![[IMAGE]](http://www.darrylsgarage.com/356/356tire1.jpg)
I didn't forget the important little factory original detail, the little wire retaining clip for the valve stems. Most people don't realize that the high speeds these old 356s are capable of can rip the valve stems right out of the rims (sarcasm intentional)!
![[IMAGE]](http://www.darrylsgarage.com/356/356tire2.jpg)
Entry: 10/17/07 - The powder coating was done today and I wasn't working at the shop so I "volunteered" to make the run down to Northwest Powder Coatings, Inc in SeaTac. I hauled the entire load back to the shop in my Honda CRV just so I could get the 5 pieces I tucked into the big batch. I had a really hard time choosing a shade of silver powder paint that matched the original silver used on the valve covers and oil filter but think I got pretty close with a clear coat over chrome. I also had the correct 356C type oil filler canister (only one big breather hose coming off it, the 912 type has a second smaller one) powder coated black and it turned out perfect too. Now I can go ahead and apply the reproduction decals to the oil filter canister, just like a 1:1 scale model kit!
![[IMAGE]](http://www.darrylsgarage.com/356/356powc1.jpg)
I also finished reaming the idle jets from "50" to "55" and the idle air jets from "120" to "140" to complete the last step in assembling the "C" spec Zenith 32 NDIX carbs. I mounted them on a wood block so I can now fill the bowls with gasoline and adjust the float levels and accelerator pump volume. I had to set the original racing type oiled-mesh air cleaners on just for grins. I also have a set of freshly powder coated air filter canisters that came with the car, I just need to reinstall the clips and the little orange warning decals on them before they can be used.
![[IMAGE]](http://www.darrylsgarage.com/356/356carbc.jpg)
Entry: 10/18/07 - Today I scrounged up the missing clips and retaining rings for the Knecht "coffee can" air filters that John Walker had provided, freshly powder coated, with the car. I had to find another set and steal the missing hardware off of them but now with a little wire brushing, the hardware is installed and they are ready to use. The last step was applying the reproduction copies of the decals that would have been on these pieces when the car was factory fresh. Unfortunately one of the orange warning label decals was cracked and upon wetting, it splintered into too many pieces to work with so that side is delayed until a new one arrives.
![[IMAGE]](http://www.darrylsgarage.com/356/356carbd.jpg)
Close-up photos of the decals show the details of the writing upon them. The German text in the orange box on the air cleaner translates to "Note! Micro-Star air cleaner element not in liquid wash out. Service when contaminated or after approx. 20,000 km (12,427 miles) renew." in English. There is an outlet label on the side of the oil filter canister that is not visible in the photos. The engine is going to look quite stunning when I get it all back together with all this fresh powder coating and crisp detail!
![[IMAGE]](http://www.darrylsgarage.com/356/356dcal1.jpg)
Entry: 10/24/07 - Over the last two days I've hauled my engine down to the shop so I could do my top-end tear-down with my boss Jack and the other mechanics there answer my questions and use the special factory tools designed to make the job easier. The oil leak at the flywheel was pretty obvious, the flywheel had been beadblasted and the sealing surface was rough so it eroded away the seal lip. I mounted the flywheel on the brake lathe and polished the sealing surface with crocus cloth and cutting oil to bring it to a mirror finish. The old seal also had a chunk torn out of the outer edge at the bottom and it wasn't evenly installed so oil was able to run out of the bottom of the seal. While I had the seal out I verified the crankshaft end-play at 0.004" and installed a new seal and new gland nut with red Loctite then torqued it to 350 ft-lbs. That should take care of that pesky oil leak! Next I mounted the engine in an engine stand and rotated it so cylinders #1 and #2 were up. I removed the rockers and head and pulled the cylinders out. There was significant evidence of burned oil in cylinder #2 that makes me suspect ring failure. Installing the new AA Products big-bore P & C set started with cylinder #1 and the 4 ring set-up with 3 sealing rings ahead of the wrist pin and the oil ring behind it made for some challenging work getting all 4 rings compressed and inside the cylinders but a little experimentation in technique resulted in finding an easy way to do it. Notice my "work bench" in the following photo, a trash can with a piece of particle board on top! No question about my low-man status in the shop and it's my privilege to make the lunch runs for the guys who make a living doing this stuff as thanks for their constant pointers and shared knowledge!
![[IMAGE]](http://www.darrylsgarage.com/356/356tend1.jpg)
I discovered that this is where the correct factory tool makes the job easy. The Hazet 85.5 mm piston ring compressing tool (VW Tool 123C) was clamped around that 4th oil ring at the workbench and then after the wrist pin and retaining 'C' clip was installed, the cylinder was pushed down onto the piston and the ring compressing tool fell off as the oil ring slid inside. Because the tool comes apart into three separate pieces, I was able to fish it out from under the cylinder as it sat just above the hole in the case. What I especially liked about using the factory tool over a generic spring-loaded ring compressing tool is that the rings gaps stayed exactly where you wanted them positioned. The generic spring-loaded ring compressing tool tended to allow the ring gap position to rotate as I tightened the clamp. Now I'm on a quest to find my own factory style ring compressing tool for each size engine I'll be rebuilding, it's just the slickest method for this task I've ever used!
![[IMAGE]](http://www.darrylsgarage.com/356/356tend2.jpg)
Finally late today I had the new AA Products big-bore P & C set installed on all 4 cylinders and the valve train reassembled and tappet clearance set to 0.006" (0.15 mm) exhaust and 0.004" (0.10 mm) intake. Tonight the engine is back home and ready to begin installing the cooling tins, carburetors and exhaust. Very soon it will be back in the car and ready to fire up!
![[IMAGE]](http://www.darrylsgarage.com/356/356tend3.jpg)
Entry: 10/25/07 - I was able to connect with one of my young, able-bodied buddies who still have good backs (read: around my daughters age) to drop by and help me lift the engine out of the Honda CR-V and carry it over to my 4-post lift. From there the engine went back on the engine stand by lifting it up high enough on the 4-post lift to bolt right up. The rest of the afternoon was spent configuring the workarea for final assembly of the engine and making a list of all the missing ingredients I'll need to get from the shop when I'm working tomorrow. I'll be damned if I can remember where I put the bolts for the clutch plate but other than that, everything looks good-to-go on Saturday. Luckily today I also received the universal fuel level gauge & injection measuring vial which supposedly works on Zenith and Solex carburetors to monitor the level of the fuel in the bowls and adjust the floats properly. The injection measuring vial is in .5 cc increments and should be perfect for setting the perfect accelerator pump stroke. All the pieces are coming together very nicely!
![[IMAGE]](http://www.darrylsgarage.com/356/356tend4.jpg)
Entry: 10/26/07 - I worked at the shop all day today and in addition to the hands-on experience of installing a new windshield and seal in a '64 356C just like mine, I went on a shopping trip into the parts room and picked-up all the last parts and supplies required to finish my engine assembly. I was advised by the mechanics that I should be running a hotter plug in the car than the ones that they observed in my engine so I followed their recommendation, going with NKG BP5HS plugs. I also bought a tube of "Dirko" case sealing compound, 4 quarts of Swepco 30 weight oil, assorted high quality "crush" type sandwiched metal exhaust and intake gaskets, sealing gaskets, M8 x 15 clutch bolts, belt, fuel filter, spare points and such. Finally, this weekend is the time to begin putting it all together, back in the car and get it running. I live for hearing it belch fire and come to life with a sweet note through that race style exhaust set-up!
![[IMAGE]](http://www.darrylsgarage.com/356/356tend5.jpg)
Entry: 10/27/07 - Final assembly of the engine was todays objective and other than an unplanned trip to the shop in Ballard to pick-up a set of intake manifold to head gaskets, everything came together quite smoothly. I don't know how I overlooked the lack of those key gaskets but none were included in either of the gasket sets (engine and top-end) I had purchased. I took extra pains to resurface the faces of the 'J' tube exhaust flanges since it looked like there had been some exhaust leakage there and I think I got a good seal. So here's how it sits tonight, the front side is all assembled and needing only a piece of 20 mm ID braided tube to connect between the oil filler can and the right air filter, the linkage to connect the thermostat rod to the carburetor pre-heat flaps and the clamp to hold the fuel line to the cooling tins. I love comparing my restoration to the old factory photo of new engines lined-up for installation, I think I got pretty close.
![[IMAGE]](http://www.darrylsgarage.com/356/356tend6.jpg)
![[IMAGE]](http://www.darrylsgarage.com/356/356fact1.jpg)
On the back side, all that remains is finding or fabricating the bracket that holds the fuel lines away from the throttle linkages and installing the pressure plate and clutch. I will be making all the adjustments to the carburetors and linkages now that they are installed on the engine yet still easy to get to and then the engine will be ready to put back into the car!
![[IMAGE]](http://www.darrylsgarage.com/356/356tend7.jpg)
Here's one more shot using the flash to capture more detail:
![[IMAGE]](http://www.darrylsgarage.com/356/356tend8.jpg)
Entry: 10/30/07 - Finishing up all the miscellaneous fabrication and assembly tasks was on the agenda for today's work on the engine. I scrounged around the shop yesterday while I was working to find the pieces that were missing from my carburetor pre-heater control rod and repair mine today. I also stopped by the ships store at my marina and found the perfect lightweight ribbed plastic, 20 mm ID tubing, intended for venting a bilge on a boat and equally suited for a crankcase vent tube on my 356 motor. I also found a nice yellow cadmium plated generator pulley nut to replace the old black painted one.
![[IMAGE]](http://www.darrylsgarage.com/356/356tend9.jpg)
The missing fuel line clamp that mounts on a captive nut under the cylinder #4 sparkplug was fabricated out of a piece of 20-gauge sheetmetal. The clamp keeps the fuel line pushed back against the front engine tin and out of the way of cylinder #3 sparkplug wire. There is no movement in the steel fuel line whatsoever, which will keep it from rubbing.
![[IMAGE]](http://www.darrylsgarage.com/356/356tenda.jpg)
The missing fuel line clamp on the back of the doghouse fan housing was copied from an original one I measured at work yesterday. The 'L' bracket was bent out of �" wide, 1/16" thick strap metal and the clamp out of 20-gauge sheetmetal. The clamp in held in place by the same, long bolt that holds the coil bracket to the front side of the doghouse fan housing and it pushes back and keeps the fuel line out of the travel area of the carburetor linkage. All that remains before installing the engine in the car is attaching the clutch (after I remove the engine from the stand) and setting-up the carburetors, which will involve filling them with gasoline and measuring the float levels and accelerator pump "squirt" volumes. Suffice to say, I am getting very excited about test driving this engine!
![[IMAGE]](http://www.darrylsgarage.com/356/356tendb.jpg)
Entry: 11/1/07 - Today's objective was to install the engine into the car. Before I could do that, I needed to clean the thick accumulation of grease and dirt from the inside of the transmission bellhousing using aerosol carburetor cleaner and plastic-bristle brushes. Once the bellhousing was cleaned and the drip pan containing a layer of old newspaper disposed of, I rolled the engine across from my shop strapped down on a piano dolly.
![[IMAGE]](http://www.darrylsgarage.com/356/356tendc.jpg)
Installing the engine had its moments. Things progressed quickly once I realized that first you get the generator to clear the rear shelf and then have the long snouts on the 356 heaterboxes clear the axles. In the process of figuring that out is where I really "screwed the pooch" and chipped the power coating on the lid of my beautiful oil filter canister! The lowering valve on my floor jack got away from me and before I could stop the oil filter canister from scraping the rear shelf, CRUNCH! The whole neighborhood heard what I wanted God to do to about it! Oh well, it's only paint and a decal, so say a $25 lesson that I should have installed the dang oil filter canister after the engine is installed, or at least protected it with masking tape! That is one draw-back of powder paint is that when it chips, it chips big chunks. For now I just gave it a quick touch-up of silver paint and will scrounge another one from the big bucket of them at work and send it off to the powder coater with the next batch of stuff. Tonight the engine sits bolted in the 356 and the Zenith carburetors are in the trunk of my car so I can finish setting them up at work tomorrow. The cosmetic blunder is a bummer but I'm really excited about starting the engine and seeing how my cheapo big-bore AA Products pistons and cylinders work with the 'C' spec Zenith carburetors!
![[IMAGE]](http://www.darrylsgarage.com/356/356tendd.jpg)
Entry: 11/4/07 - As luck would have it, a big load of engine tin was waiting for me to haul down to the powder coater when I arrived at work on Friday. I told my boss Jack about what I did to the beautiful oil filter canister and he fixed me up with the correct 'C' type to put in with the load going to the powder coater! It turns out the one I chipped was actually a '912' type oil filter canister so this is going to work out better than I had planned! I stayed late at work to properly set-up my rebuilt Zenith carbs and was able to catch a clogged injector and malfunctioning accelerator pump plunger on the bench tester instead of in the car. Today I bolted the Zeniths to the engine, hooked up the wires, fuel line and throttle control rod and then turned it over with the coil wire detached to build up oil pressure and prime the carburetors. When I connected the coil wire the engine fired right off and it runs quite smoothly with no blue smoke. I did some preliminary carburetor syncing but ran out of time due to a social engagement so I'll have to pick up where I left off on Tuesday. I checked back on it this evening and there is no oil leaking from the flywheel seal anymore, so it looks like the operation was a success. After carburetor syncing, I just need to install the rear engine tin and pre-heater plumbing before I can take the car for a test drive. On a side note, while under the car today I confirmed the transmission serial number is 74057, which matches the number on the certificate of authenticity I received from the factory.
![[IMAGE]](http://www.darrylsgarage.com/356/356tende.jpg)
Entry: 11/6/07 - My plans to get the 356C engine installation all buttoned-up today took a drastic detour when the gal I've been dating called in a panic that her SUV was "on fire" and she needed help. I packed my tool bag and headed to her house where it turned out to be a hole in the radiator. I had the old radiator out and new one on order within a few hours (this is called earning "brownie points" where I come from) and will install the new one for her after it arrives tomorrow. I was able to do a little restoration work on a correct 6-volt voltage regulator for the 356C late in the evening. I have two of the correct black cover with the white tamper-detection dot of paint voltage regulators; one John Walker gave me with the car, the other I found at the John Walker swap meet back in July. Both voltage regulators had been checked-out as working by the automotive electrical shop we use down in Ballard last week. They also both looked about the same except one still had the original yellow sticker. NLA Limited carries a reproduction of the yellow sticker so the voltage regulator without the sticker was the lucky restoration candidate. I thoroughly cleaned the original black paint with a plastic bristle brush and soft cloth soaked in mineral spirits, then instead of repainting it with black paint, I used my preferred method of giving it a thin coat of clear high temperature engine paint, being careful to keep it off any of the electrical connections. The original sticker was paper so I wanted the decal to look thicker. I accomplished this effect by sticking the decal to a thick piece of pressure sensitive adhesive plastic (a.k.a. a bumper sticker) and then trimmed that down to size and stuck the combination to the voltage regulator. Since the voltage regulator had been disassembled, the white tamper-detection dot needed to be restored. I filled the phillips screw slots with autobody red oxide glazing putty and then mixed white hobby type model enamel with a little tan enamel to give the dot a proper "patina" so it doesn't look brand new. As you can see in the following photograph, the side-by-side comparison of the two voltage regulators speaks for itself. Now I need to fabricate wires to connect the voltage regulator to the generator with the proper factory type connectors using the fancy Wurth crimping tool at work.
![[IMAGE]](http://www.darrylsgarage.com/356/356volt1.jpg)
Entry: 11/9/07 - I had planned on replacing the primative "crimp" style wire connectors on the wiring loom that connects the generator with the voltage regulator using the fancy Wurth crimping tool at work. My boss, Jack took one look at my wiring loom and pointed out the ground wire was too small of gauge wire. He then went into the parts room and returned with a used, original 356C wiring loom and handed it to me while telling me it was his "donation" to my 356 project! So, it just happened that a box from NLA Limited containing a set of new generator terminal boots was waiting for me on my doorstep when I came home from work. So after some aggressive cleaning with carburetor cleaner and aircraft paint stripper, a coat of clear high-temperature engine enamel and new terminal boots, I've got a factory original generator to voltage regulator wiring loom, with the correct wire colors (notice the negative is yellow with a brown stripe) ready to install on the car with the restored voltage regulator. Talk about feeling lucky to be working for such a great boss like Jack! By chance the powder coating order was ready to pick up today too, so the correct 'C' style oil filter canister (without a big chip in it) is also waiting for installation!
![[IMAGE]](http://www.darrylsgarage.com/356/356wire1.jpg)
Entry: 11/10/07 - Today I finally got some time to finish up the installation of the engine tins, the new voltage regulator and generator to voltage regulator wiring loom. Getting the rubber seal around the perimeter of the engine tin to correctly wrap around the opening in the engine compartment was the biggest challenge but after several hours of persistent work, it is exactly where it is supposed to be. The rear engine tins dropped right into place and the carburetor pre-heater duct work is all reconnected. The new, correct voltage regulator and wiring loom really looks great, I just need to figure out where to connect the static suppression condensors that are mounted on each side of the voltage regulator. Once I swap out the chipped '912' oil filter canister with the correct, freshly powder coated 'C' one, it will be perfect. I will probably wait until the next oil change to do that little job though.
![[IMAGE]](http://www.darrylsgarage.com/356/356tendf.jpg)
Today I finally mounted the restored 4�" painted factory steel wheels with the new Vredestein 165/15 tires that I restored last month. The 165 width tires are noticably thinner and look more "Volkswagenish" than the chrome wheels and tires I removed. I painted the hubs black and decided to leave the hub caps off the wheels for the time being, just bacause I rather like the sporty look of the naked wheels. Now I just need to add the 356C to my collector car insurance policy so I can test drive the car and get it up to full operating temperature before final adjustment of the carburetors.
![[IMAGE]](http://www.darrylsgarage.com/356/356whl5.jpg)
Entry: 11/13/07 - Today I was blessed with some calm and sunny weather in which to take the photos of the car I need to submit with the collector car insurance application form. While I had the car out in the sunshine, I thought a couple "artsy" photos would be fun to look at and imagine a flawless silver paintjob and lobster red interior with. The engine is essentially finished and looking "mechanically fresh" with all the factory new gold zinc parts, new cheesehead screws and glossy powdercoating. Definitely not a "concours" attempt here but set up as the reliable driver engine with that distinctive German simplicity and utility, looking more tractor-like than sportscar.
![[IMAGE]](http://www.darrylsgarage.com/356/356ins1.jpg)
I'm also enjoying the contrast between the newly painted wheels and the rough body. There is going to be quite a bit of bodywork involved in making the car mirror perfect again. For now I'm just going to enjoy putting around in the car for a bit and "tinkering" with it while pouring my restoring efforts into the 912. I checked on the 912 doors and engine lid in the bodyshop today and saw no progress, I can't wait until they have the car itself... I'll then have lots of room for a certain 1956 Volkswagen oval window that's going to be coming to its new home soon after Thanksgiving! It's becoming quite obvious, my first 6 months of bachelorhood is turning me into a car drunk!
![[IMAGE]](http://www.darrylsgarage.com/356/356ins2.jpg)
Entry: 11/16/07 - While I'm waiting to get my collector car insurance approved and the paperwork mailed to me, I need to address the state of the driver's seat. About a month ago, I won a nice set of seats on eBay that I believed would fit into my car and that I could use until I had my original seats reupholstered and restored back to brand-new looking. The eBay seats were red and would need to be hidden under sheepskin seat covers, but were still solid enough to provide good support and make driving the car enjoyable.
![[IMAGE]](http://www.darrylsgarage.com/356/356seat1.jpg)
Well, what were advertised as '62 356B seats were discovered to be '59 356A seats and too wide to fit the tracks in my 356C! I was bummed, so I started scrambling to figure out how to make my original, completely rotten seats servicable. I asked my boss Jack if he had any old seats I could remove the seat bottom upholstery from to put on mine. When I told him about my 356A seats not fitting, his ears perked right up, saying he needs seats for his '58 356A he is currently restoring. He also mentioned he had a set of 356C seats in storage he would trade me for my 'A' seats. Well, long story short, here's the seats he traded me for:
![[IMAGE]](http://www.darrylsgarage.com/356/356seat2.jpg)
They've like new, having been reupholstered using an economy vinyl kit and so the fit and texture of the light vinyl isnt the best, but they're 100% servicable and won't require use of a sheepskin cover to match the black interior of my car! So with that problem solved, it's time to clean-up the interior of my car, wire brush and seal the surface rust on the solid floor pans with Rust Seal or Eastwoods Rust Encapsulator. Once it's all clean, I'll cut some thick tar paper to fit and lightly glue it down until I do the real restoration. I'll reinstall the pedal boards and the new rubber floormats I've purchased from Stoddards. I'm also considering making some temporary carpet using some bulk gray perlon that is laying around down at the shop, this is the same carpet used in late 914 cars that didn't have any binding. I just want to make the car look a little bit more presentable without spending much money. Later, after the exterior is all restored, the $667 GAHH lobster red German square-weave carpet kit will go in.
![[IMAGE]](http://www.darrylsgarage.com/356/356flr0.jpg)
Entry: 11/18/07 - I got a good start on the floor preservation project by wire brushing and scraping all the loose floor coating and surface rust deposits. Once vacuumed-up I applied a single coat of NAPA rust converter followed, after drying overnight by a coat of rubberized undercoating. I am extremely pleased with how solid the sheetmetal still is, no major rust scales anywhere on the pan as the rust is just a thin and uniform coating consistent with chronic exposure to dampness, not water pooling. I also removed the outboard seat track support bases for a quick media blasting and coat of semi-gloss black paint.
![[IMAGE]](http://www.darrylsgarage.com/356/356flr1.jpg)
Once the rubberized undercoating is dry, I'll fabricate a set of sound deadening pads by laminating a few sheets of thick roofing tar paper together using 3M spray carpet adhesive. I a light "string" of 3M weatherstrip adhesive across the floorpan will hold them secure, especially once formed to the floor contours with my heat gun. I wanted to take a look at the reproduction floor mats I purchased from Stoddards, Mookie, my miniature schnauzer gave them a good close inspection and her wet nose stamp of approval.
![[IMAGE]](http://www.darrylsgarage.com/356/356flr2.jpg)
Entry: 11/21/07 - The wooden pedal boards cleaned-up nicely with a fresh coat of paint so after installing them, it was time to start gluing in the dark gray perlon carpet off the huge roll I brought home from work. I was able to get the carpet covering the center hump behind the stick shift housing and both door sills glued in, which allowed me to install the freshly blasted and painted outboard seat track support bases and the rubber floor mats. I left lots of extra material up in the front cowl area which will need to be trimmed back when I do the finish work there. I will be fabricating pockets in that cowl area out of sheetmetal to approximate the shape of the originals and cover them with the perlon carpet and this "Trim-Loc" rubber edge trim I've ordered in 1/8" thick and 7/16" wide to use as a finishing edge on all the weatherstrip lips around the door openings. I'm planning on removing the rear seats and fabricating a box to cover the rear seat area too but for now I'm just focusing on what needs to be done to mount the front seats so I can drive the car as soon as my insurance documents arrive. I rather like the minimalist look of the gray perlon carpet as it reminds me of the 911 RS look found in later factory race cars, perfect for a bitchin' "rat-rod" 356 like mine!
![[IMAGE]](http://www.darrylsgarage.com/356/356flr3.jpg)
Entry: 11/22/07 - I resisted the temptation to stay in bed watching the Thanksgiving Parades and put in a few productive hours before my Thanksgiving Day festivities started. I had blasted and painted the seat tracks with Eastwood's Clear Zinc spray paint yesterday evening so they were ready to install this morning. Making the necessary holes in the carpet covering the center hump went quickly and everything bolted right in. As it turns out the next step, restoring the heater vent sliders will require removing the outboard seat track support bases in order to allow access with a screwdriver. As you can see in the following photo, the perlon carpet really formed nicely to the front cowl areas and the recesses for the pockets are quite visible.
![[IMAGE]](http://www.darrylsgarage.com/356/356flr4.jpg)
The rear seat footwell's heel panel also went in very cleanly and the contrast between the old and new is quite alarming. I'm planning on building a floor / cubby-hole area similar to this type used on the 911 but kept much simpler in design. I'm also thinking about replacing the dried-out leather side and rear panels with panels covered in the same perlon carpet just because it would be such a big improvement for so little effort or cost. I'm looking at all this carpet work as a temporary solution until I do the complete make-over after the 912 project is complete. All my clean-up work also prepared the original seatbelt mounts for new vintage-style 2-point lap belts I'll be needing to order.
![[IMAGE]](http://www.darrylsgarage.com/356/356flr5.jpg)
Entry: 11/25/07 - Over the last couple days, I've media blasted and painted the metal heater door slider tracks with Eastwood's Clear Zinc spray paint and cleaned up the black plastic heater doors. Today I cut out the carpet covering the heater ducts and installed the doors prior to installing the seats for the first time. I must say that I'm very, very pleased with how well these seats, new perlon carpet and new rubber floor mats have really cleaned-up the interior and will make it very servicable for quite some time before I can totally strip the car down for the future repaint and factory correct interior. A few more finishing details on the edge trim, seat belts, map pockets and door threshold mats and it will look very presentable.
![[IMAGE]](http://www.darrylsgarage.com/356/356flr6.jpg)
I also stripped out the original leather covered panels from the rear part of the cabin and will need to consult with my buddy and local expert 356 interior trimmer, Steve Shepp of Classic Interior Restorations of Ballard. It would be great if he would allow me to copy his patterns for those panels so I can make temporary replacements covered with the perlon carpet. At least now it just looks stripped and not quite as nasty as the old panels looked back there. With the seats now in the car, it is ready to drive, break-in the new rings and do the final tune of the carbs, once my insurance documents arrive sometime this coming week.
![[IMAGE]](http://www.darrylsgarage.com/356/356flr7.jpg)
Entry: 11/28/07 - I've been studying the naked interior rear quarter panel area and the old leather covered panels I took out of there and decided a �" thick piece of closed-cell foam would be the perfect material for an underlayment in that area. So in addition to a trip to "The Foam Shop" in Bellevue to get a 72" x 20" piece of �" closed-cell foam, I stopped by Lowes and picked-up a 4' length of ribbed rubber stair runner for covering the door threshold.
![[IMAGE]](http://www.darrylsgarage.com/356/356flr8.jpg)
I used a large piece of brown craft paper to make a pattern of the shape of the custom-fit foam pad and cut it out of the �"closed-cell foam, making sure to work with the curl of the roll over the convex surface it was to cover. Closed-cell foam is critical when using spray-on 3M trim cement since it can't soak into the foam. Open-cell foam allows the glue to soak in and then when sticky won't decompress where pressure is applied, leaving a deformed, lumpy surface. The final shape of the foam pad is compared to the original padded fiberboard panels in the following photo.
![[IMAGE]](http://www.darrylsgarage.com/356/356flr9.jpg)
Once the foam was glued in, a piece of perlon carpet was glued over top of it and the edges trimmed to fit final size. I temporarily attached the leather covered metal caps that run under the windows to finish the edge. The leather needs to be removed and I'll probably just media blast and paint them with black crinkle paint for a clean utilitarian look. The right side looks good...
![[IMAGE]](http://www.darrylsgarage.com/356/356flra.jpg)
and the left side looks good. Now I just need to fabricate the rear storage box and cover it and the rear bulkhead with perlon carpet and it's done.
![[IMAGE]](http://www.darrylsgarage.com/356/356flrb.jpg)
Entry: 11/29/07 - Today's task was to make a cardboard pattern of the cover of the rear parcel. The final size came out to 23�" wide and lines up with the lip forming the front edge of the rear jump seats. I'm planning on putting a �" or so lip on the forward edge to keep things laying back there from sliding forward but my goal is simplicity, nothing too ornate. I'll probably use �" thick chip board for the cover and glue on the carpet so it rolls over the edges giving the impression it's easily removable.
![[IMAGE]](http://www.darrylsgarage.com/356/356flrc.jpg)
Here's the view from through the back window. I'm quite amazed at how much actual storage room there will be under the parcel shelf in the rear seat wells. You can also see from this angle, the original shoulder harness mounting points have been reinstalled and look quite sharp.
![[IMAGE]](http://www.darrylsgarage.com/356/356flrd.jpg)
Entry: 12/1/07 - Today I used the cardboard pattern and fabricated the rear parcel shelf out of a left-over sheet of �" masonite and a 2" x 2" cut down to 1" x 1�" with a �" wide by �" deep groove cut into it to glue the masonite into.
![[IMAGE]](http://www.darrylsgarage.com/356/356flre.jpg)
I also carpeted the rear bulkhead so that it was ready to reinstall the luggage tie-down loops and install the parcel shelf into the existing screw mounts used for attaching the carpet mat glued to the seat backs.
![[IMAGE]](http://www.darrylsgarage.com/356/356flrh.jpg)
Entry: 12/2/07 - Today I stopped by the hardware store and purchased a couple 3/8" carriage bolts, a couple barrel bolts and a length of 3/8" threaded rod in order to fabricate a pair of adjustable legs from them to support each end of the front beam of the parcel shelf. I also started sizing the rubber stair-runner mat for the door threshold covering and I'm quite pleased with how much it resembles the stock rubber mat but at a fraction of the cost. I just placed some scrap carpet in the rear seat wells to see how that looks and decided to leave the front open so it's easier to access the space under the parcel tray and because it's pretty much hidden by the seat backs anyway. Just to explain the blue masking tape in the photo, I re-glued the headliner back to the window post.
![[IMAGE]](http://www.darrylsgarage.com/356/356flrf.jpg)
The view through the rear window shows a really clean, German race-car look, achieved for less than $100 worth of carpet and materials plus seats and new rubber floor mats. Now I need to get the black plastic edge trim to put the finishing touches on the door openings and clean-up those leather-covered metal caps under the rear quarter windows.
![[IMAGE]](http://www.darrylsgarage.com/356/356flrg.jpg)
Entry: 12/3/07 - Torrential rains and flooding kept me from going into work today but by some lucky coincidence, the "Trim-Loc" rubber edge trim I ordered in 1/8" thick and 7/16" wide to use as a finishing edge on all the weatherstrip lips around the door openings arrived today. A few hours of work and I had the door openings both done and I'm very pleased at how it cleaned up the rough edges.
![[IMAGE]](http://www.darrylsgarage.com/356/356flri.jpg)
I also finished trimming the door threshold rubber mats to size and used carpet tape to install them. Now all I need to do is find an appropriate sized rubber weatherstrip to glue in the lip that runs around each door opening to seal out water and wind noise. Still no insurance paperwork in the mailbox... better give them a call and see what's holding it up. Not like I'm going to be doing any driving with snow, wind and torrential rains but I want to be ready when that first warm, dry day shows up!
![[IMAGE]](http://www.darrylsgarage.com/356/356flrj.jpg)
Entry: 12/5/07 - I found some quick-and-dirty weatherstripping today at Lowes; �" by �", light gray, high-density, closed-cell foam with an adhesive backing. It fits into the weatherstrip lip around the door almost perfectly and will do for now. I'm really looking for a product in the bulk aircraft or automotive type weatherstrip with a hollow tube on the outer edge and in black neoprene. I see the stuff on-line but really need to see some "hands-on" to know if it will work. New reproduction weatherstrip is $26 per side from Stoddards and I might have to go that direction depending on cost. For now I've got something that eliminates wind-noise, rattles and seals out water so I'll put up with the primative appearance.
![[IMAGE]](http://www.darrylsgarage.com/356/356foam1.jpg)
I also installed the seatbelts today after giving them a little "bling" by adding some hubcap badge "stickers" made from clear synthetic resin which I bought on eBay.
![[IMAGE]](http://www.darrylsgarage.com/356/356foam2.jpg)
The seatbelts really complete the interior look until you look forward and see those tired door panels and bare dash. Well, I guess that's where I need to focus next and think recovering the original dash with black vinyl would be a fun little project. Cleaning-up the rust and preserving the orginal steel dash skeleton and rubberized horsehair padding for a future recover in red leather is a good use of my time too.
![[IMAGE]](http://www.darrylsgarage.com/356/356dash1.jpg)
Entry: 12/8/07 - This evening I tore into the original, red leather, redyed black dash pad. The leather was starting to dry rot and the steel dash skeleton had quite a bit of surface rust but the rubberized horse hair padding along the front edge was still pretty much intact. Rust and rotten leather dust was everywhere but I was able to get all the pieces apart.
![[IMAGE]](http://www.darrylsgarage.com/356/356dash2.jpg)
A few minutes in the blasting cabinet and the steel dash skeleton was rust free and ready for a coat of primer or Eastwood's Rust Encapsulator. I started to straighten out the bent area around the hole for the map reading light but need to test fit it to the car and line-up the mounting holes before getting too aggressive with metal shrinking and hammering. I think this is going to be easy to recover and make presentable again.
![[IMAGE]](http://www.darrylsgarage.com/356/356dash3.jpg)
Entry: 12/9/07 - Strange karma... right now there are three original 1964 Porsche 356 C model cars visiting me at the shop. Now I really don't put much stock in karma, but it is rather odd that the exact car I need to reference and document with digital photos for my own restoration should converge on the shop in the color of my VW cabriolet? I smile and wonder if my wife had anything to do with it. Strange, the thoughts a person has when they're left behind by their best friend. By the way, that's my Hazet "Assistant 166N" in the foreground, my goal is to build the most complete and compact 356C road repair tool kit. All the modestly priced (read: NOT Snap-on or Hazet) tools contained in it are stored in zippered pouches that will be emptied into various tool stashes in my own 356C for that "epic road trip" with a 356 car club someday. I've been buying the tools I need to borrow from the other mechanics at work and weeding out the unused ones to minimize weight. The acid test is getting my "Assistant" in and out of my car trunk with my bad back, lightness is a great incentive!
![[IMAGE]](http://www.darrylsgarage.com/356/356karma.jpg)
Entry: 12/11/07 - I dug through the parts that came with the car and found the two chromed-steel door threshold plates were still in quite servicable condition, especially after a good cleaning and polishing with chrome polish! I hunted-down some of the appropriate round-head, counter-sunk #6 sheetmetal screws to hold them in, then removed the edge trim and weatherstripping I installed the other day. After doubling-up the weatherstrip across the bottom and installing the door threshold plates, the opening looks much more finished and it is more watertight. I also removed the door panels and test fit the metal dash skeleton, making the final tweaks to the straightening work I've been doing. A re-dye of the door panels and covering the dash skeleton with black vinyl will be the next tasks on the interior.
![[IMAGE]](http://www.darrylsgarage.com/356/356flrk.jpg)
Now here's kind of a sick, ghetto Porsche from the disco age kind of look. Genuine Empi VW Beetle nerf bars for a '68 or later ($53.64 a pair at Cip1.com) held in place using the wrench magnets from my toolbox.
![[IMAGE]](http://www.darrylsgarage.com/356/356empi1.jpg)
Now here's an "artist's" (of the BS variety) rendering of how the nerf bars could be "lightened" to radically alter the VW bug look and parallel the contour of the body better. The front ones will be easy, the rear ones are going to need some help since they won't slide through the bumper bracket hole in the fender!
![[IMAGE]](http://www.darrylsgarage.com/356/356empi2.jpg)
Entry: 12/12/07 - I spent the greater part of the day down at my after-work beer drinking / cigar smoking buddy Steve Shepp's upholstery shop in Ballard. Steve told me to bring my dash skeleton and the rubberized horse hair padding down and he would "coach" me through the "proper method" to cover it. Holy cow did I learn a lot of the "tricks of the trade" and the dash reupholstery job turned out way beyond my expectations, done with my own two hands! There is much to know about proper materials, professional quality glue, pressure pot to spray on the glue with and much more. What I ended-up with is a perfect dash pad in a vinyl grain that matches the leather on my door panels for about $12 in materials. Steve said he would have charged an off-the-street customer $375 for the same job! Now it did take a few hours and it was hard work so $375 seems like a reasonable cost for a job like this but I love doing stuff myself for pennies and calling it entertainment. When I get around to making the interior red leather, the dash pad will only require removing the black vinyl, all the padding glued to the metal skeleton can be recovered as it is, so that counts as progress on the eventual total restoration.
![[IMAGE]](http://www.darrylsgarage.com/356/356dash4.jpg)
I also recovered the metal cap that goes at the bottom of the driver's side rear quarter window using the same vinyl as I used on the dash pad. The other three metal caps and the door panels were cleaned vigorously and prepped for vinyl dye using lacquer thinner. It took several coats of SEM product's black vinyl dye, rotating the panels 180� between coats to make sure coverage was complete. As you can see in the following photo, the results of the re-dye were pretty stunning and the metal cap recovered in black vinyl blends in with the re-dyed leather ones almost perfectly. Tomorrow I'll clean-up the insides of the doors and install all the pieces I finished today. I really enjoy doing upholstery work and I love the opportunity to apprentice under the guidance of a master artisan like Steve.
![[IMAGE]](http://www.darrylsgarage.com/356/356door1.jpg)
Entry: 12/13/07 - I got a good start on the door panels today, beginning with treating all the exposed rust inside the door with NAPA Rust Converter and covering the exposed inside edge of the door sheetmetal with a strip of black striping tape to cover the nasty looking rust and chipped silver paint. Installing the door panels went pretty quickly and they look quite sharp with the shiny new trim screws. The metal caps under the quarter windows and door windows really clean-up the shabby appearance of the rear compartment and all that remains there is figuring out what to do about the quarter window seal that glues to the metal lip over the headliner.
![[IMAGE]](http://www.darrylsgarage.com/356/356door2.jpg)
The original door handles and window riser cranks seem to have a problem sliding down the splined shafts of their respective control levers. I'm thinking I might have to buy new just to get ones that will work. I also worked on the final finishing of the dash pad before I can install it. Cutting out the hole for the map light and hunting for the holes for the trim screws that attach it to the metal dash took much more time than I figured so the dash isn't installed in the car yet. I gave the bare media blasted metal on the back side a thick coat of clear to keep it from flash rusting again in the future. The glue used to hold the dash padding and vinyl on had to be used on bare metal for it to stick so the clear-coat paint had to be done afterwards. I'm getting very close to having the interior completed and await warmer, dry weather to give it the maiden voyage on the new engine.
![[IMAGE]](http://www.darrylsgarage.com/356/356door3.jpg)
Entry: 12/15/07 - Today I finally got some time to install the newly recovered dash pad. Installation went without any drama. All the screw holes lined right up and everything centered into the mounts as original. I also reinstalled the seatbelts that I had taken down to Steve Shepp for shortening. I ended up taking about 18" off the buckle side of each one and Steve sewed a standard "parachute" stitch on the rolled-over ends as per aircraft industry standards.
![[IMAGE]](http://www.darrylsgarage.com/356/356dash7.jpg)
I had left a flap of extra vinyl material on each end of the dash cover so that I could properly pack the void between the dash and door frame with cotton "wadding" that Steve Shepp had provided me with. The extra vinyl material was trimmed down so only the top layer actually gets tucked under the Trim-Loc moulding. I rather like how fitting my "Hazet Assistant" key fob looks dangling from key in the ignition, I'm such a sucker for vintage automobilia due to my car dealership "shop-rat" childhood.
![[IMAGE]](http://www.darrylsgarage.com/356/356dash5.jpg)
I also installed the map light in the center of the dash and it comes on when the doors open or when I flip the switch to the 'ON' position, as per the owner's manual instructions. I'm just about out of things I need to do to call this little "interior refreshening" project finished. I have to figure out the door / window crank attachment problem and a solution to the missing trim around the back quarter windows but there is nothing keeping me from driving the car at this point and starting to debug the non-working tachometer and assuring that all the warning lights are operational.
![[IMAGE]](http://www.darrylsgarage.com/356/356dash6.jpg)
Entry: 12/29/07 - It's been cold and rainy all week after snow on Christmas so I'm starting to get a bad case of cabin fever being unable to test drive this car! So what to do but give in to the voices in my head that tell me I should just put the original bumpers back on and see what that looks like before giving into the whole nerf bar idea. The car came with new repro bumper deco strips still in the plastic wrappers so the real challenge will be mounting them first. Sounds like the perfect thing to do in the basement while watching football like I did with the dash pad! All the original mounting hardware has been found in its own plastic baggie so this should go pretty smoothly once the deco strips are mounted.
![[IMAGE]](http://www.darrylsgarage.com/356/356bump1.jpg)
Entry: 1/19/08 - Well, last Sunday the weather was sunny and beautiful so I finally started the car, grabbed the carburetor synchronization gauge and small straight blade screwdriver and started dialing in the carbs. Things got off to a pretty good start, the idle was set but the carbs took a few seconds to idle down when I took my foot off the gas pedal. A little more adjusting and driving around and it was finally starting to behave as they should. I did notice that the exhaust was quite sooty at higher RPM like it's running extremely rich for some reason, probably too big of jets. Suddenly the car started missing terribly and a quick test by pulling spark plug wires off the distributor showed #3 cylinder was dead, probably a fouled plug from running rich, no biggy. Then I noticed the big puddle of purple Swepco motor oil that formed under the car, dripping from the bellhousing! The leak I thought I had fixed by replacing the rear main seal and polishing the flywheel mating flange was back! I had also replaced the oil cooler seals so something much more serious is wrong... SHIZNIT! So looks like the engine will be coming back out of the car and getting a complete tear-down to have the case inspected for cracks and resealing it myself upon reassembly... GRRRRR! I keep repeating to myself, "This is a hobby... this is a hobby..." knowing that life as a mechanic is full of little disappointments like this, suck it up and figure it out. On the bright side, my '63 VW Cabriolet's new top is almost done and I've been installing a new German square-weave carpet set in it under Steve Shepp's tutoring down at his shop. I also bought this snazzy set of wire headlight protectors and installed them on the 356C to enhance the vintage racer look.
![[IMAGE]](http://www.darrylsgarage.com/356/356wire2.jpg)
Entry: 12/26/08 - The 356C project has been mothballed (fuel drained) until I finish construction on my new shop and move in. A severe oil leak in the bell housing area will require removal of the engine and running it outside the car on an engine test stand I've fabricated in order to determine the exact location of the leak. Meanwhile, I've found the Porsche produced movie, "Made By Hand" on YouTube.com which shows 356B cars being produced in the 1960 timeframe.
Part 1 of 5:
Part 2 of 5: Part 3 of 5: Part 4 of 5: Part 5 of 5:Entry: 9/30/11 - Good news, I've finished a "revolutionary change period" in my life and it's time to start working on the 356C again. In the last year I've moved to a country acreage, built a new, bigger "facility" for my hobby, and am finally all set up to begin restoration work again. My new shop has 50% more floor space at 24' x 36' and I've built in the necessary work bench and cabinets to keep my tools out of the dust and mess that comes with media blasting and metal working. Like the Three Little Pigs, this, my third shop is the culmination of years of thought and planning and it is a joy to spend time in when the gloomy winter weather sets in.
![[IMAGE]](http://www.darrylsgarage.com/67ghia/newshop.jpg)
Separated by a wall from the shop is a 36' x 60' climate-controlled "showroom" where I display all my projects in one place; the future, in progress and completed ones. Above the showroom is a loft of the same dimensions to serve as a warehouse for organization and storage of all the parts of the dismantled projects since I usually have a couple going at one time. It's been a hell of a lot of work to get this done in a year but my productivity and enjoyment of my hobby should be greatly enhanced. Life out in the country is pretty great too and I have immediate access to some beautiful country roads without having to drive my classic old cars on a freeway to get to them. Not a bad way to start a new chapter of my life and I hope to be blogging frequently again soon.
![[IMAGE]](http://www.darrylsgarage.com/67ghia/showroom.jpg)
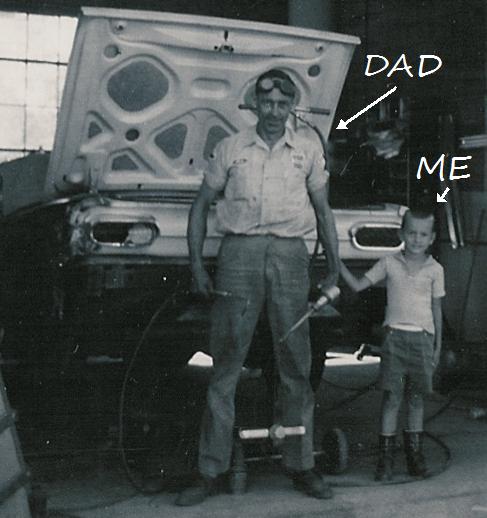